

MCP proxy definitions use the Tyk OAS format. They are not available as Tyk Classic API definitions. For the full definition structure, see MCP proxy definition.
Permissions
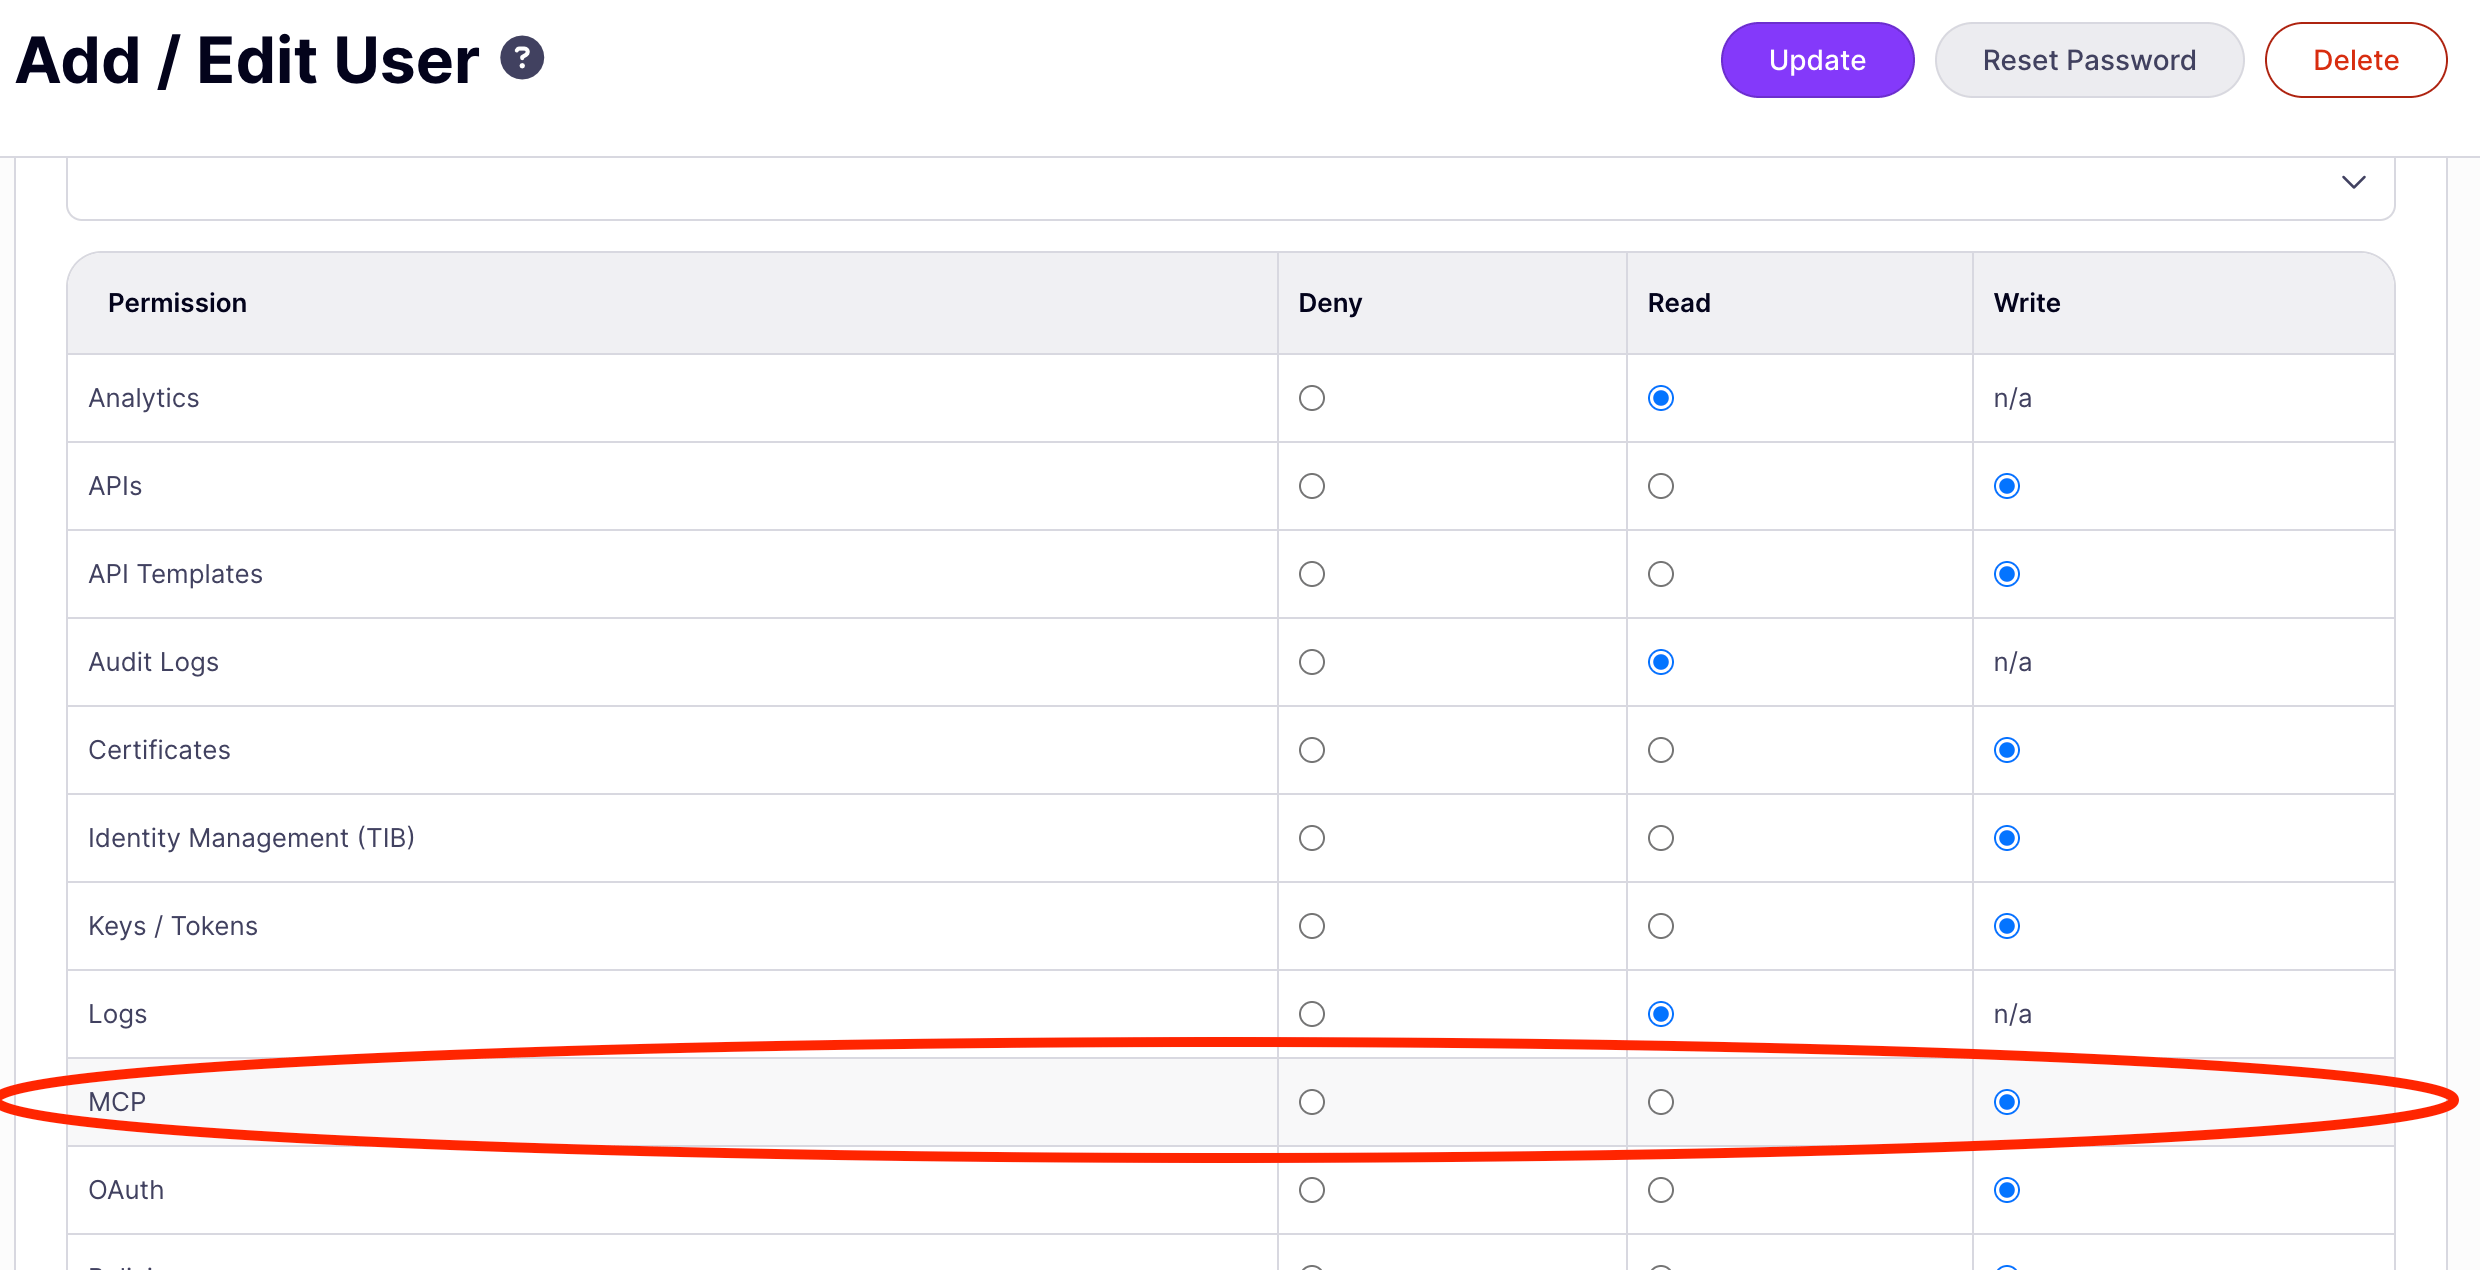
Access to MCP proxy management is controlled by themcp permission on the user’s role.
Permissions are assigned in the Dashboard under User Management → Users. For organization-wide access control, configure permissions on user groups rather than individual users.
The MCP proxies list
The list page shows every MCP proxy managed by this Dashboard instance. Clicking a row opens the MCP Designer. The search input at the top filters proxies by name in real time. Clear the input to return to the full list. The Add MCP Proxy button opens the Create an MCP proxy screen.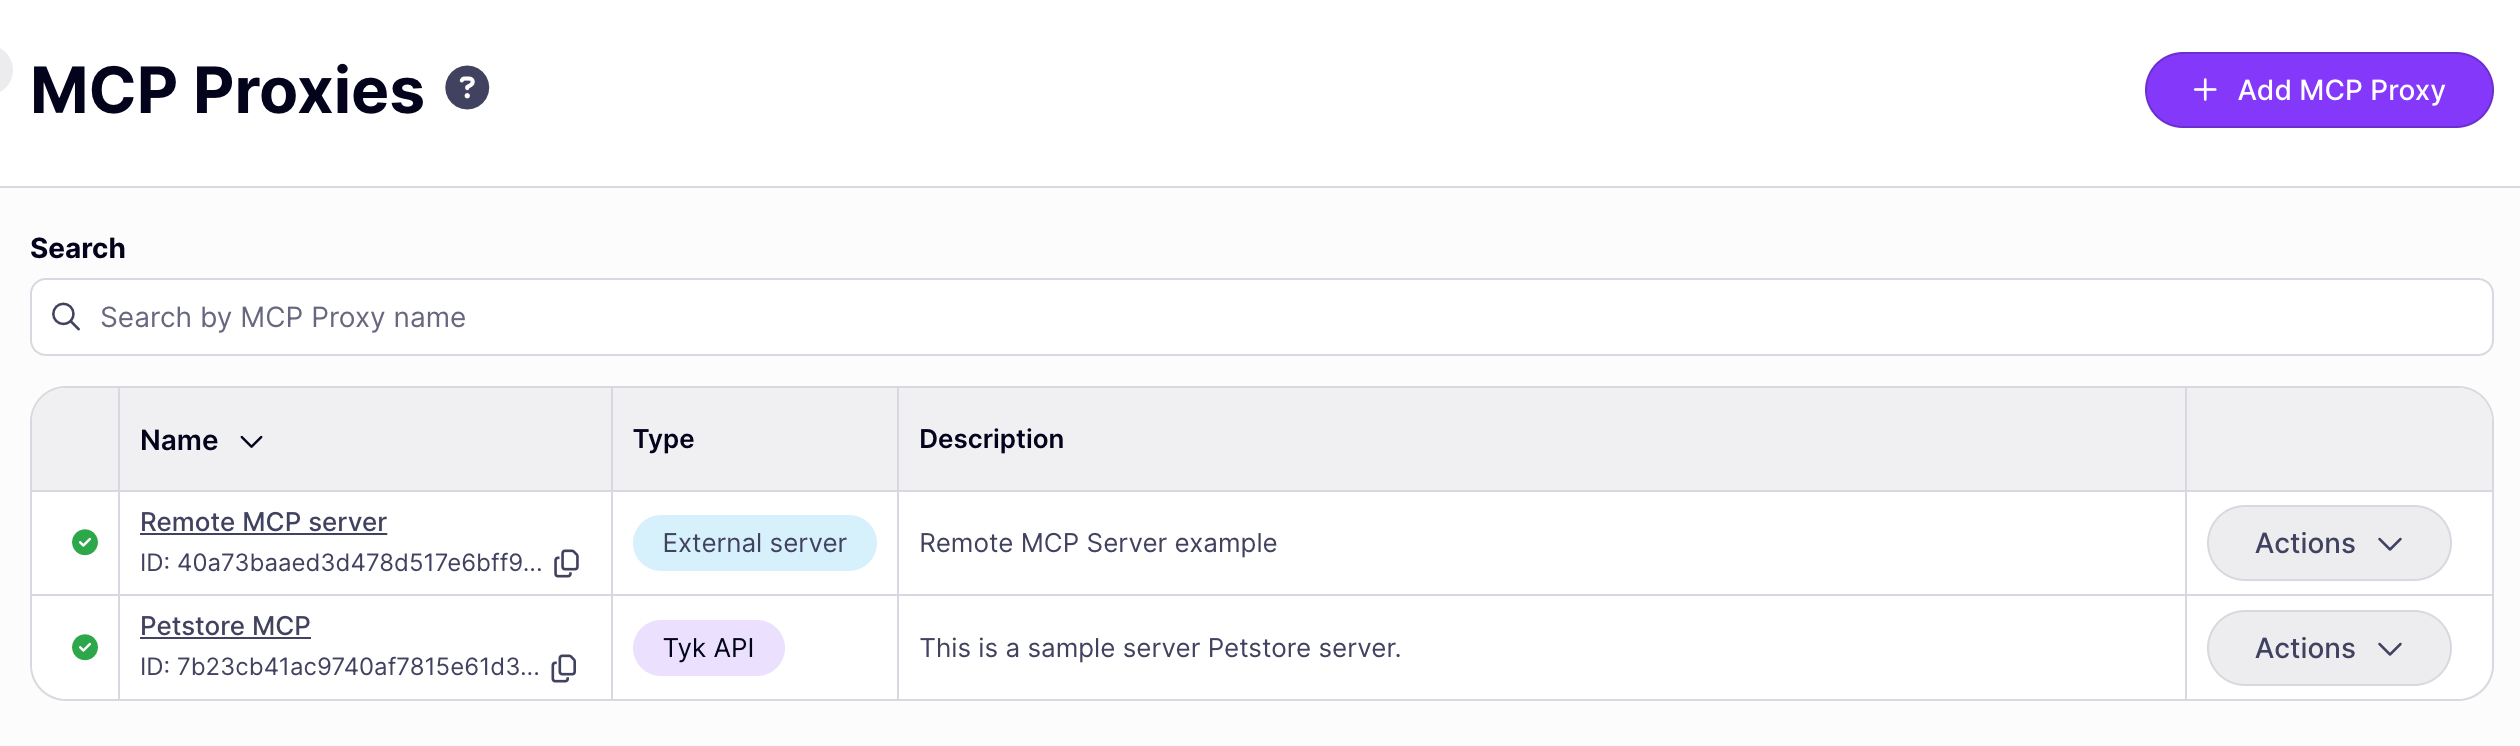
Create an MCP proxy
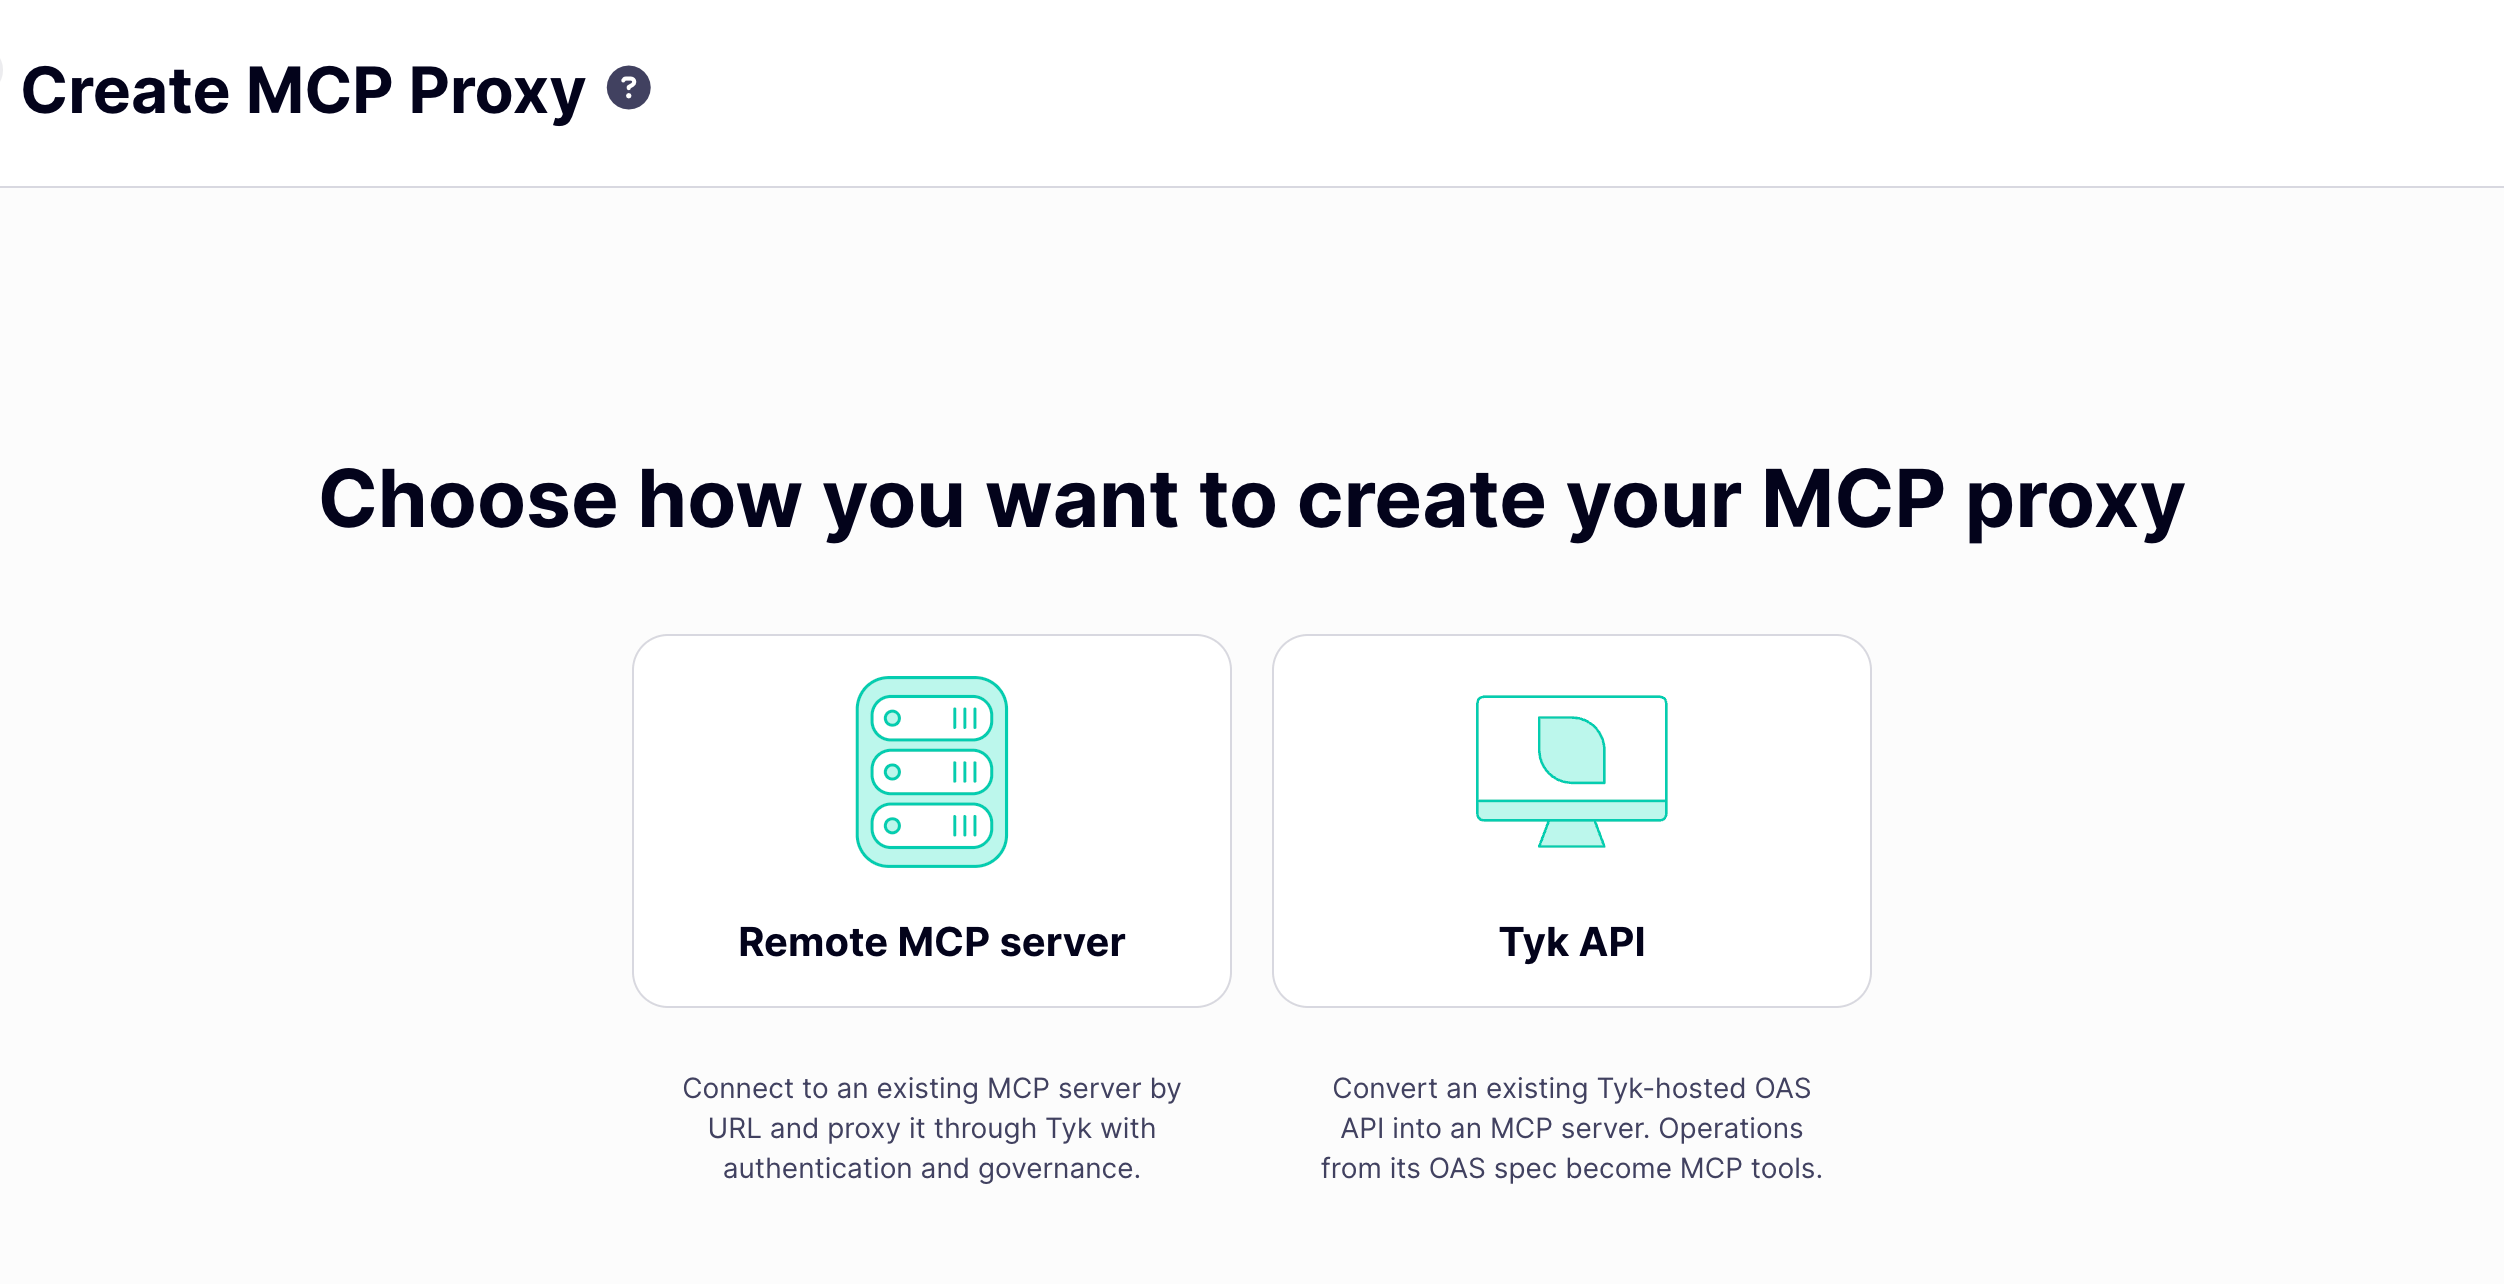
Clicking Add MCP Proxy on the proxy list opens the Create MCP Proxy screen, where you choose how to create your proxy:- Remote MCP server: connect to an existing MCP server by URL and proxy it through Tyk with authentication and governance.
- Tyk API: convert an existing Tyk OAS API into an MCP proxy. Operations from its OpenAPI spec become MCP tools.
Remote MCP server
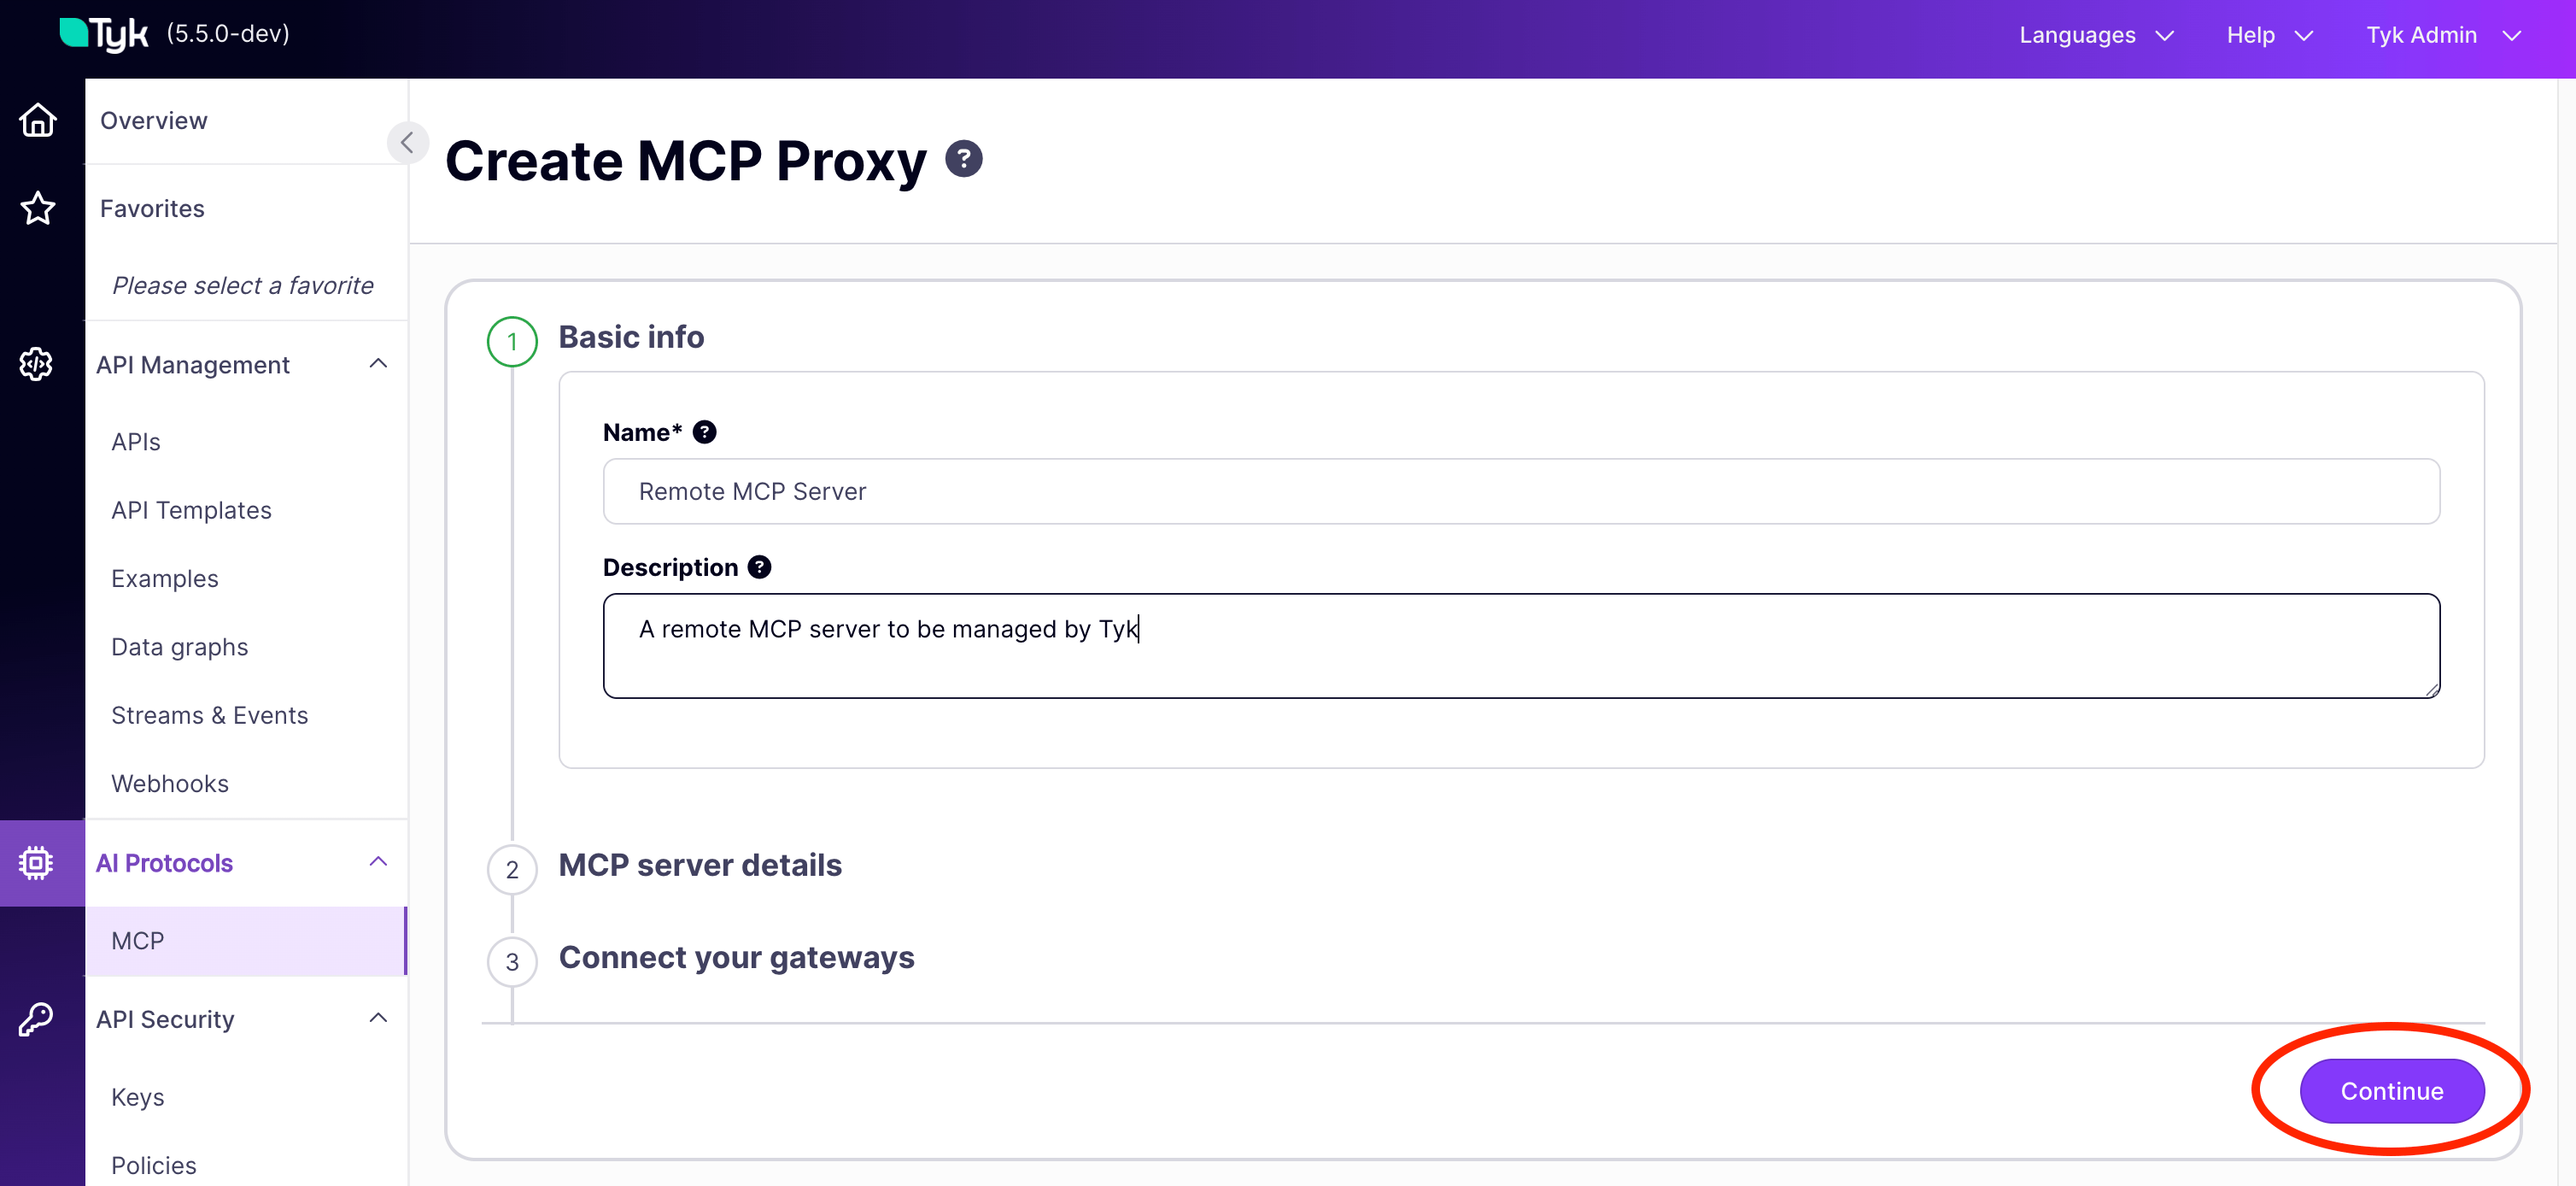
This wizard collects the minimum information needed to proxy an existing MCP server. It has three steps.Step 1: Basic info
The name must be unique across all MCP proxies in this Dashboard instance.
Click Continue to proceed.
Step 2: MCP server details
Enter the full URL of your upstream MCP server, for example
https://weather-mcp.example.com/mcp. This is the server Tyk proxies to, not the URL clients use to connect to Tyk.
Click Continue to proceed.
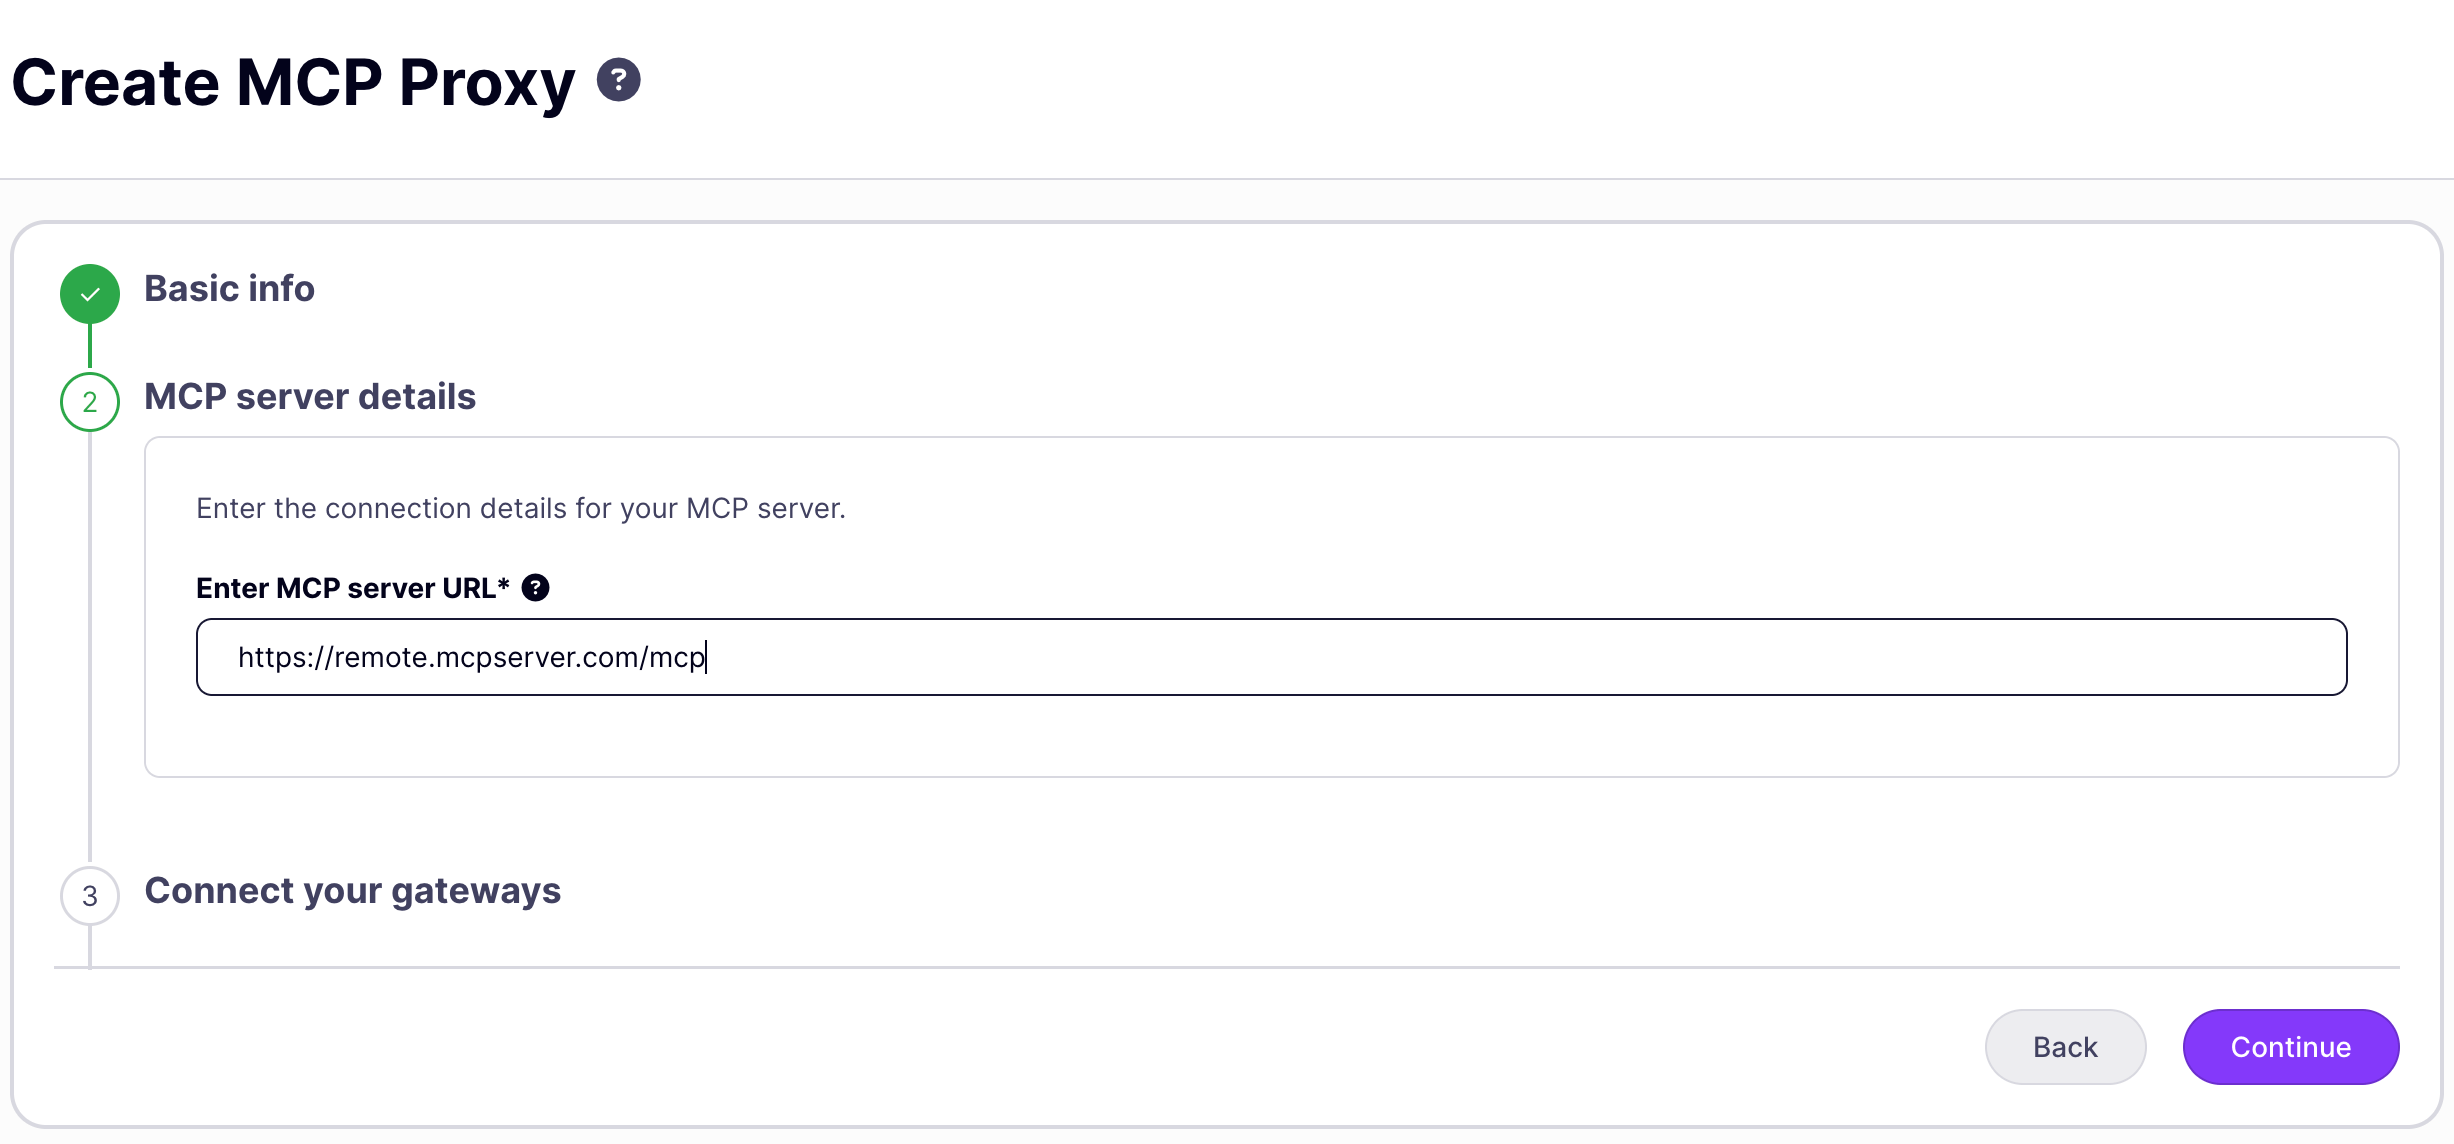
Step 3: Connect your gateways
Click Finish to save. The Dashboard displays “MCP proxy successfully created” and returns you to the proxy list.
For most deployments you’ll want to open the MCP Designer to configure authentication, add per-primitive middleware, or set up OAuth discovery. See the Settings tab and Primitives tab below.
Tyk API
This wizard generates an MCP proxy directly from a Tyk-managed REST API. It has four steps.Step 1: Basic info
Same Name and Description fields as the remote MCP server wizard, above.Step 2: Select API
Search for the source API by name, ID, or tags. Selecting a row expands a version picker so you can choose which version of the API to expose; the proxy is locked to that version, and switching to a different version later requires creating a new proxy. Only Tyk OAS APIs appear in this list. Tyk Classic API definitions cannot be used to generate MCP proxies. See Requirements. Click Continue to proceed.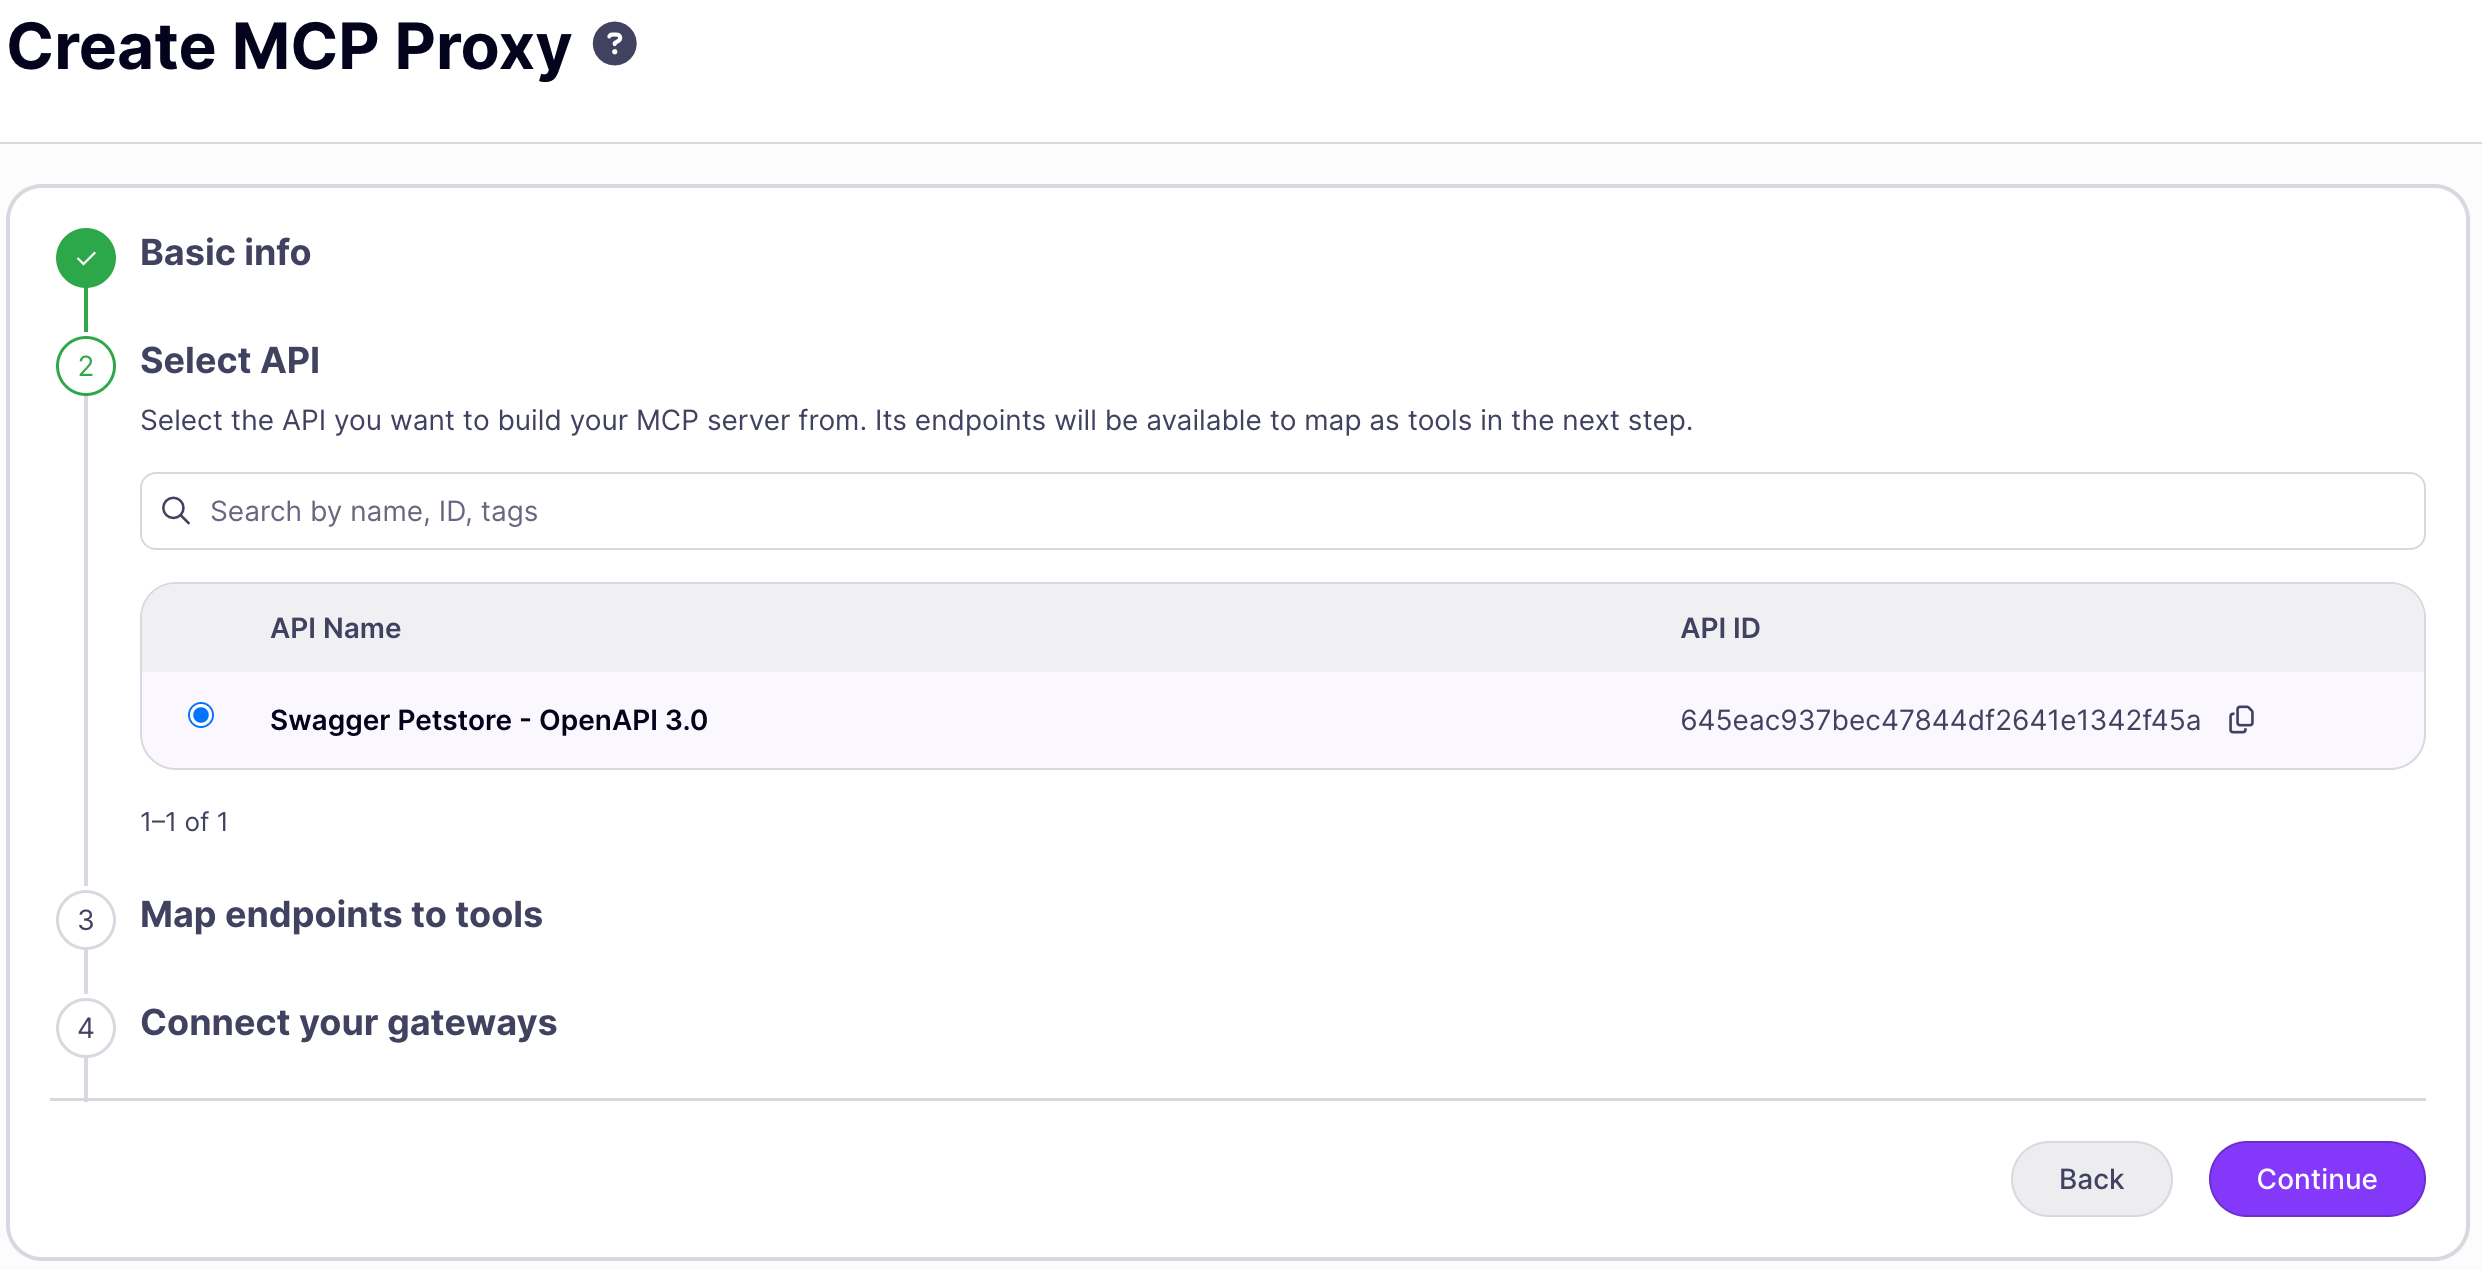
Step 3: Map endpoints to tools
All valid endpoints from the source API’s OpenAPI spec are mapped as tools by default. Deselect any endpoint you don’t want to expose, following Tyk’s Deny by Default guidance: favor building up an explicit allow-list of only the operations an agent needs, rather than leaving every operation exposed. Use the search box and HTTP method filter to narrow the list; the counter shows how many of the total endpoints are currently selected.Mapped tools inherit the source endpoint’s name and description. To override a tool’s name, description, or parameters, use the Tool mapping tab of the MCP Designer after creating the proxy. See Tool mapping tab below.
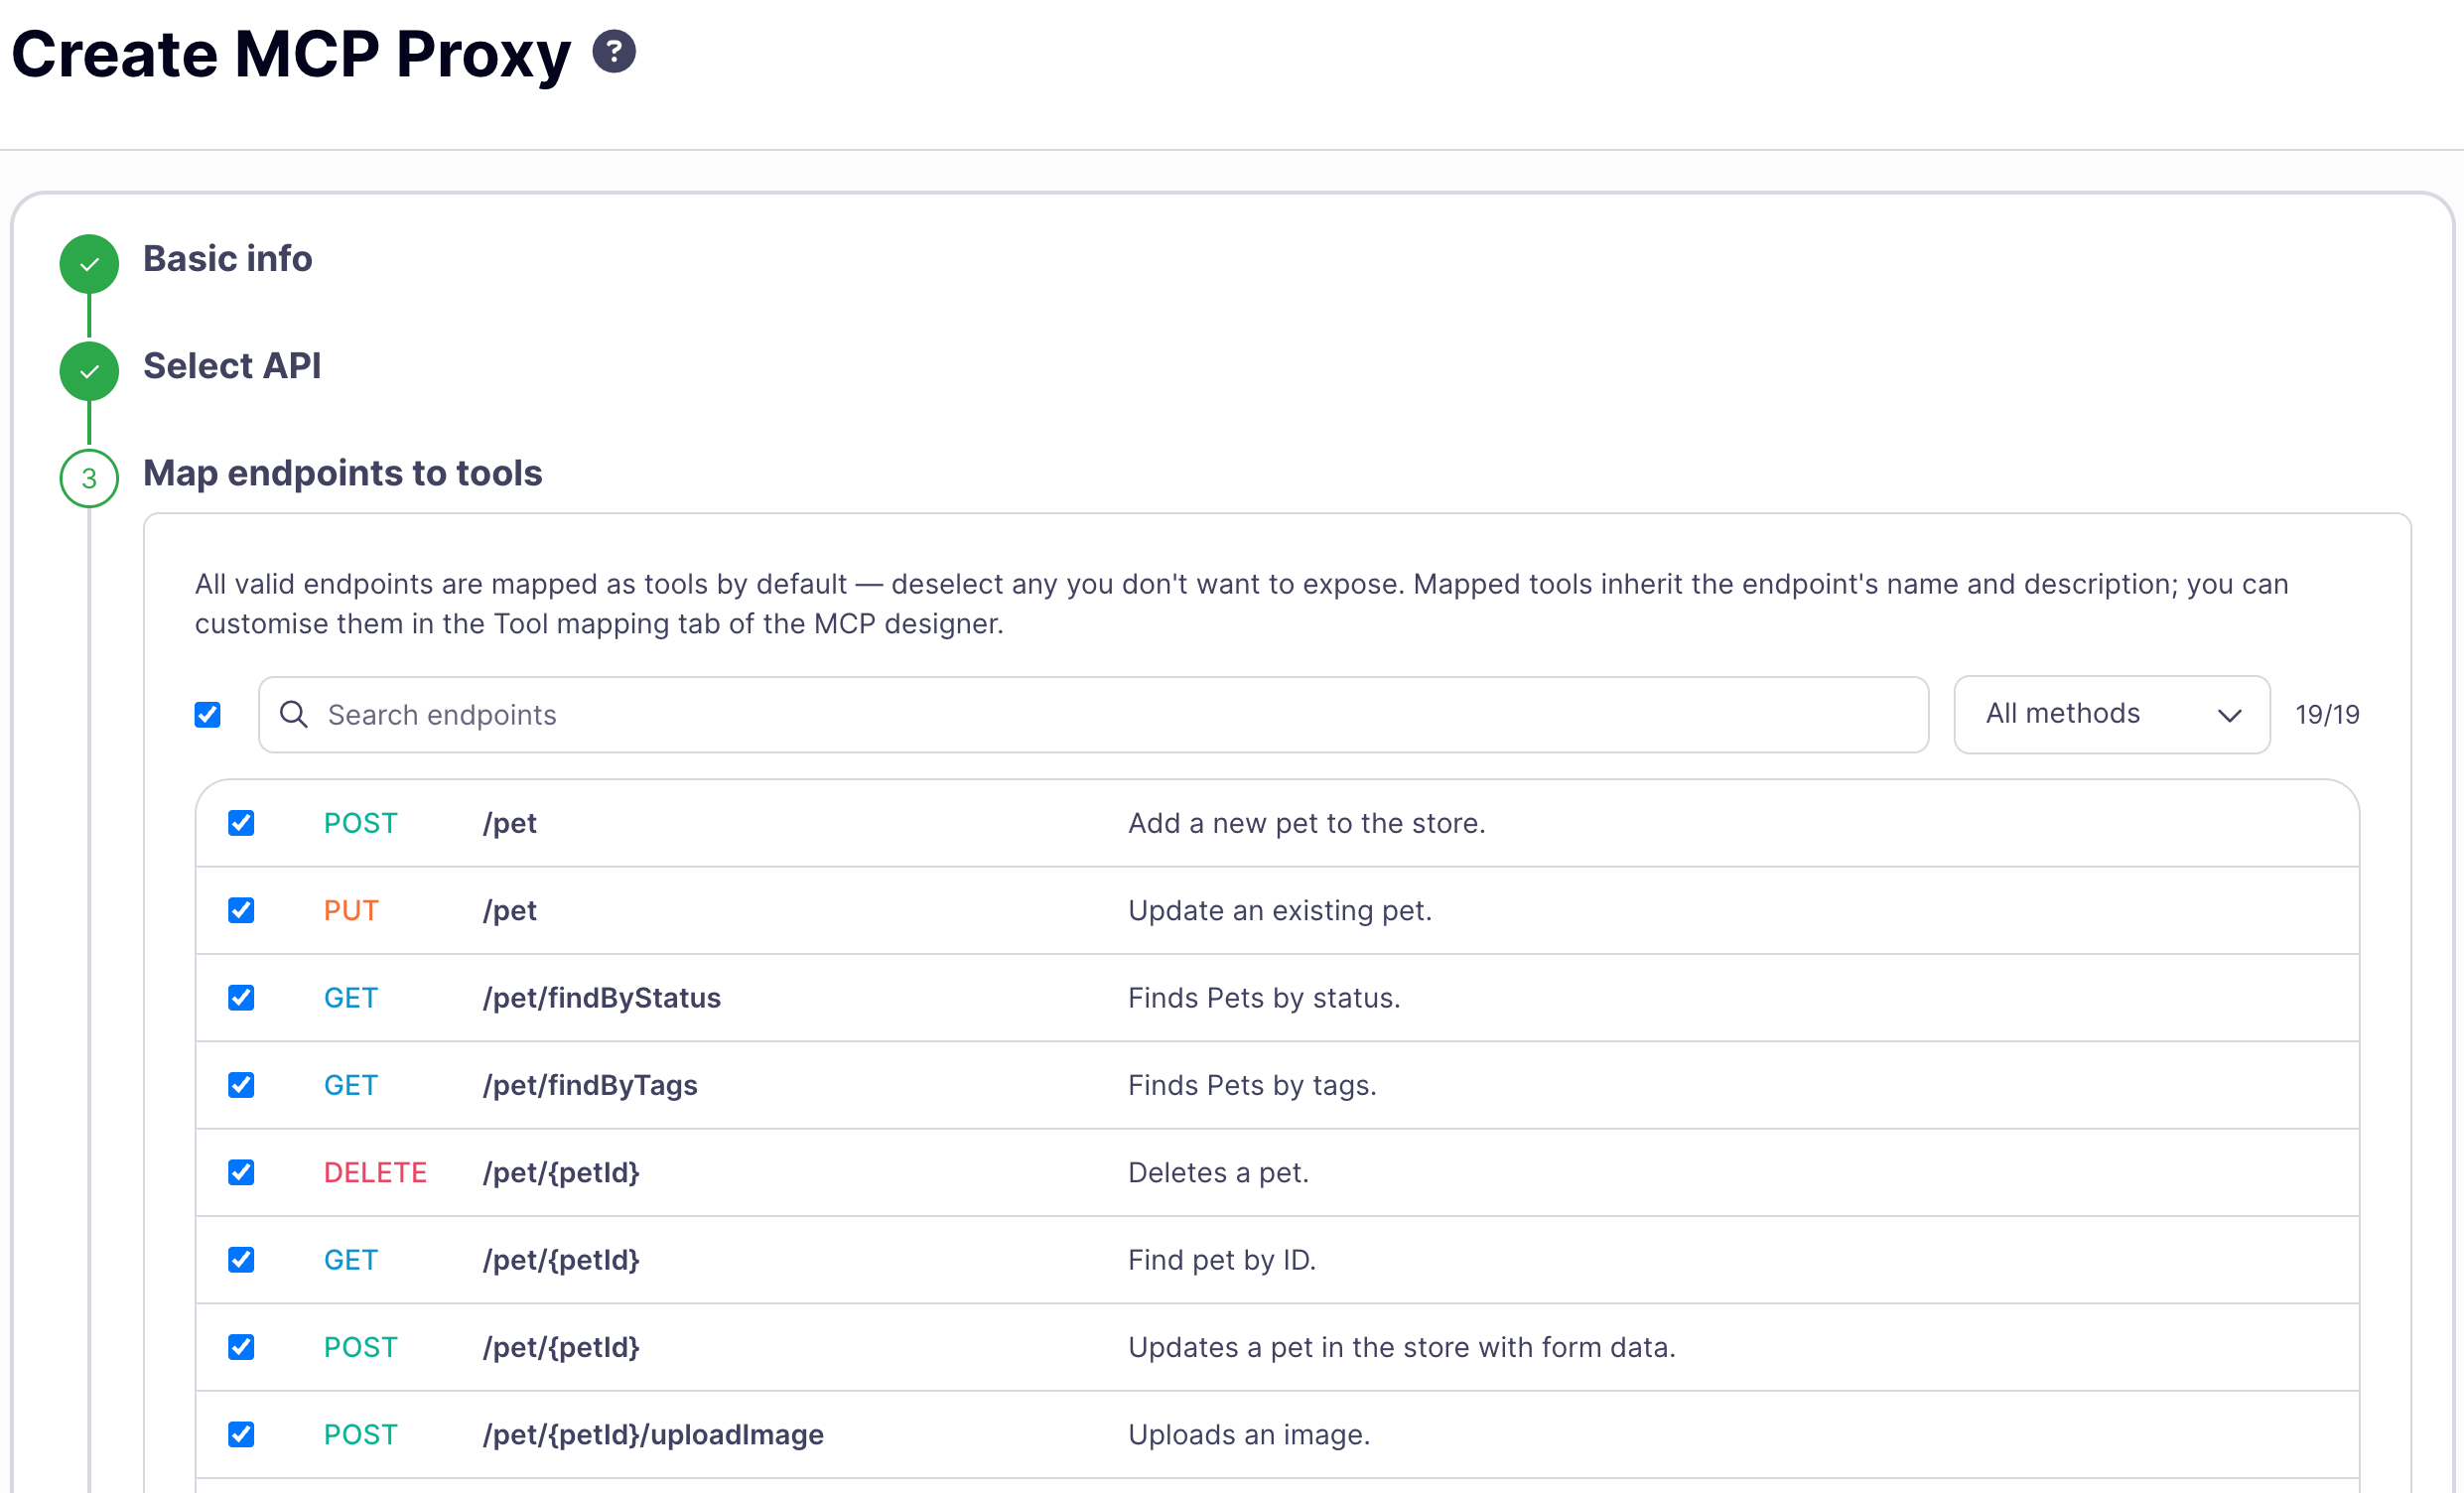
Step 4: Connect your gateways
Unlike the remote MCP server wizard, deployment targets for a REST API to MCP proxy are inherited from the source API and can’t be set here. Set the initial MCP proxy Status (Active or Inactive). Click Finish. This does not create the proxy immediately: Tyk previews the generated tool catalog and takes you to the MCP Designer with the preview pre-populated. Review the tools on the Tool mapping tab, then click Save MCP Proxy to create the proxy.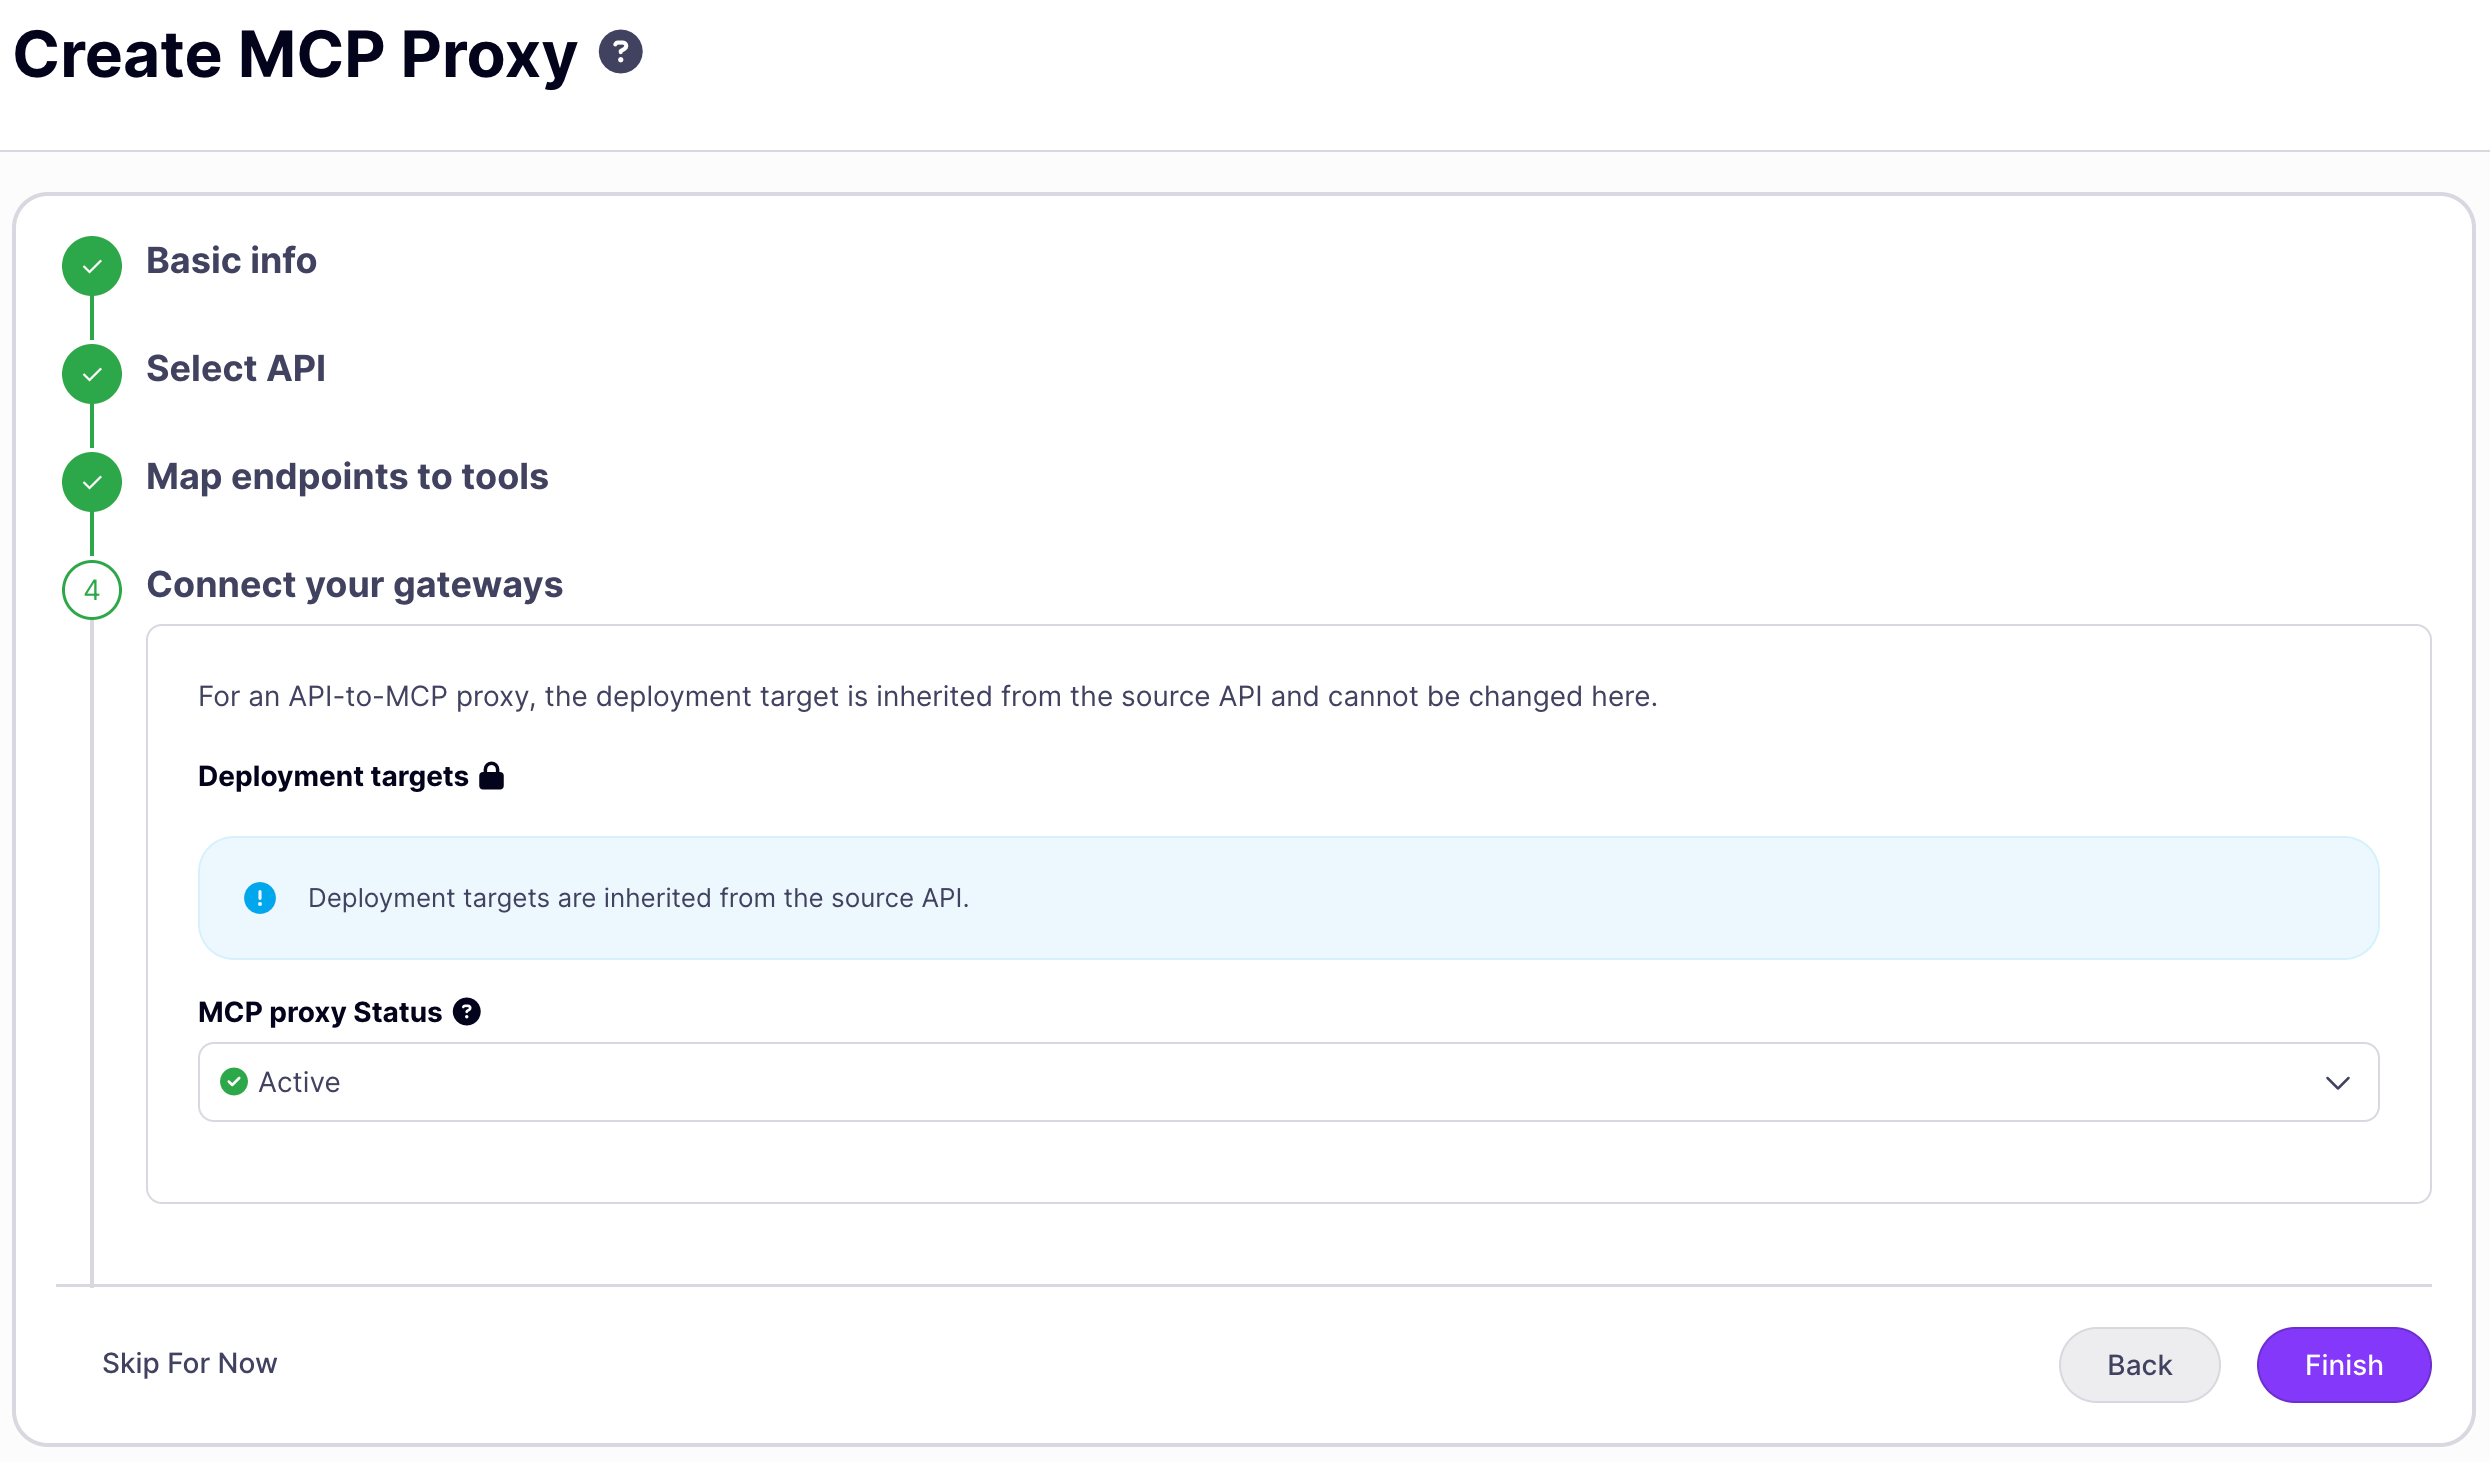
The wizard creates the proxy with no authentication (keyless access) by default. Before deploying to production, open the Settings tab to configure an authentication method, or the Tool mapping tab to rename tools and parameters before saving.
The MCP Designer
Clicking a proxy in the list opens the MCP Designer. For a proxy fronting a remote MCP server, the MCP Designer has two tabs: Settings and Primitives. For a REST API to MCP proxy, the Designer inserts a third tab, Tool mapping, between them.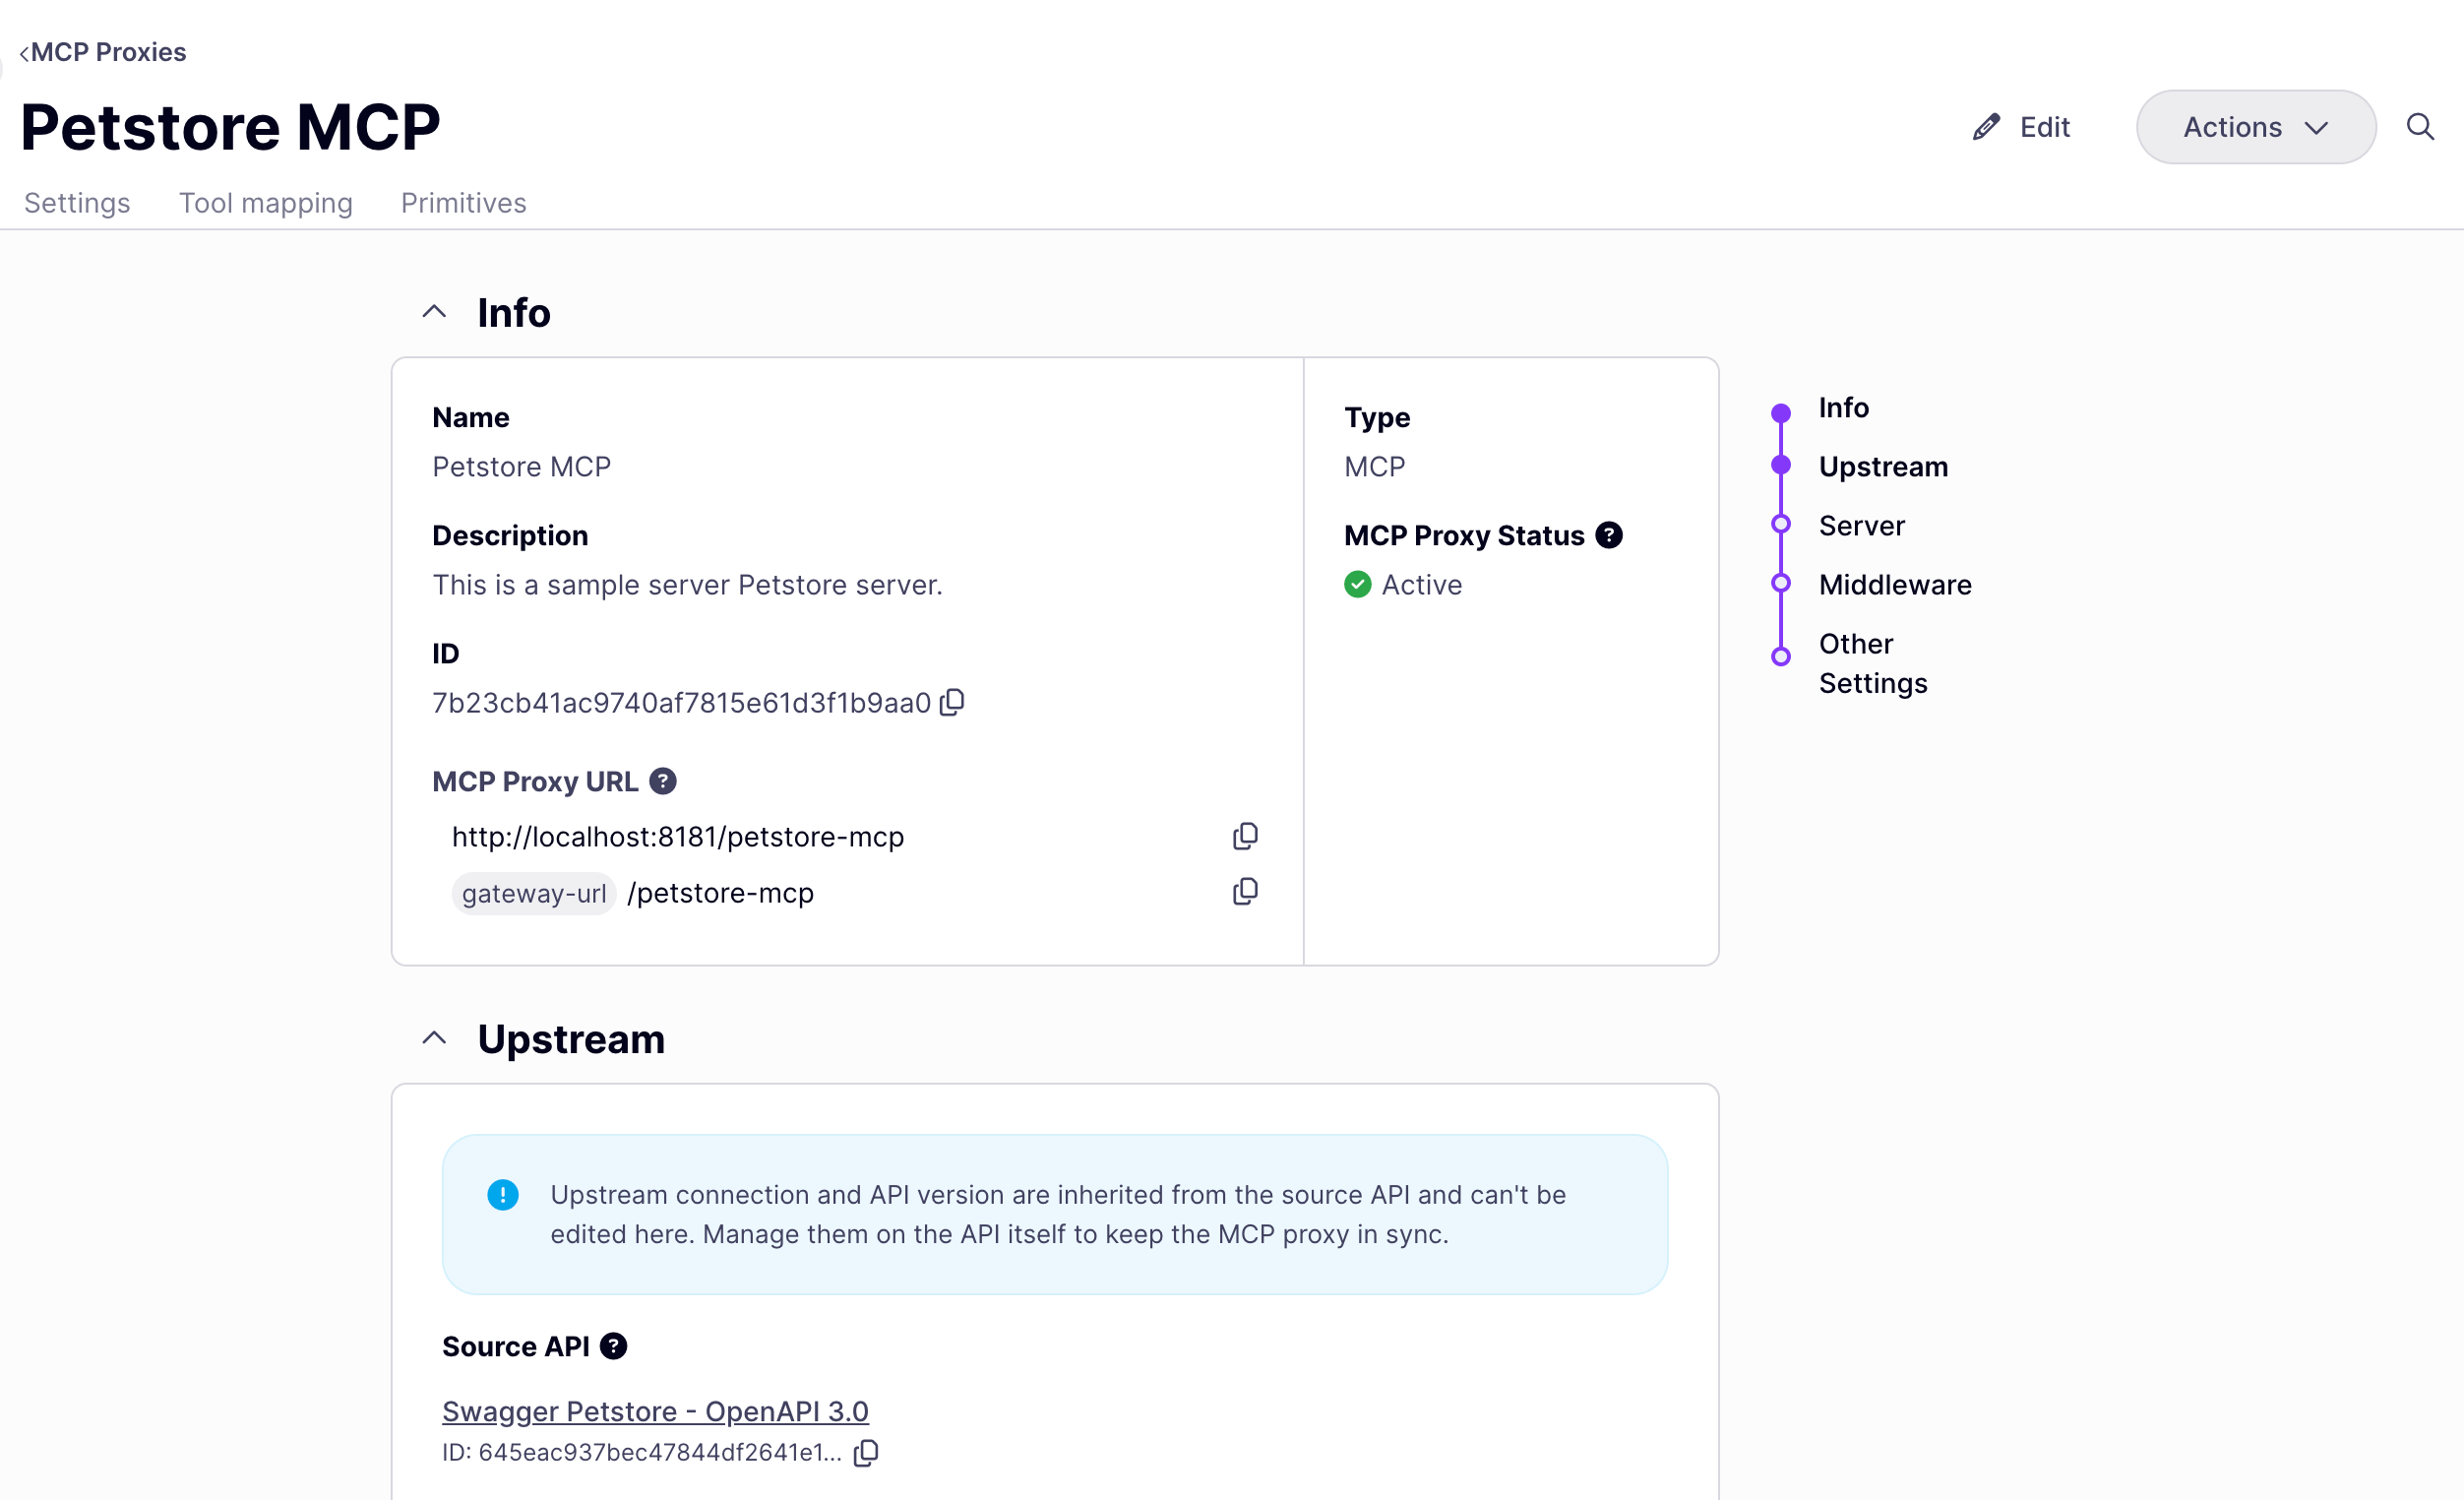
Settings tab
The Settings tab covers two areas: core proxy configuration and proxy-level middleware. Core configuration: name, upstream server URL, and gateway assignment. To edit these fields, make your changes and click Save MCP Proxy. The Dashboard triggers a gateway reload automatically. Authentication: the authentication method applied to all inbound requests. Select a method from the Authentication type dropdown. See Authentication for all supported methods and configuration options. Proxy-level middleware: middleware that applies to all requests through this proxy, regardless of which primitive is invoked. The following options are available in the Settings tab:
These options map to
x-tyk-api-gateway.middleware.global in the proxy definition. For full configuration details, see MCP middleware: proxy level.
Tool mapping tab
The Tool mapping tab appears only on REST API to MCP proxies. It lists every operation available from the source API on the left; only the operations you select are exposed as tools on this proxy. A counter shows how many of the total operations are currently exposed, and a search box filters the list.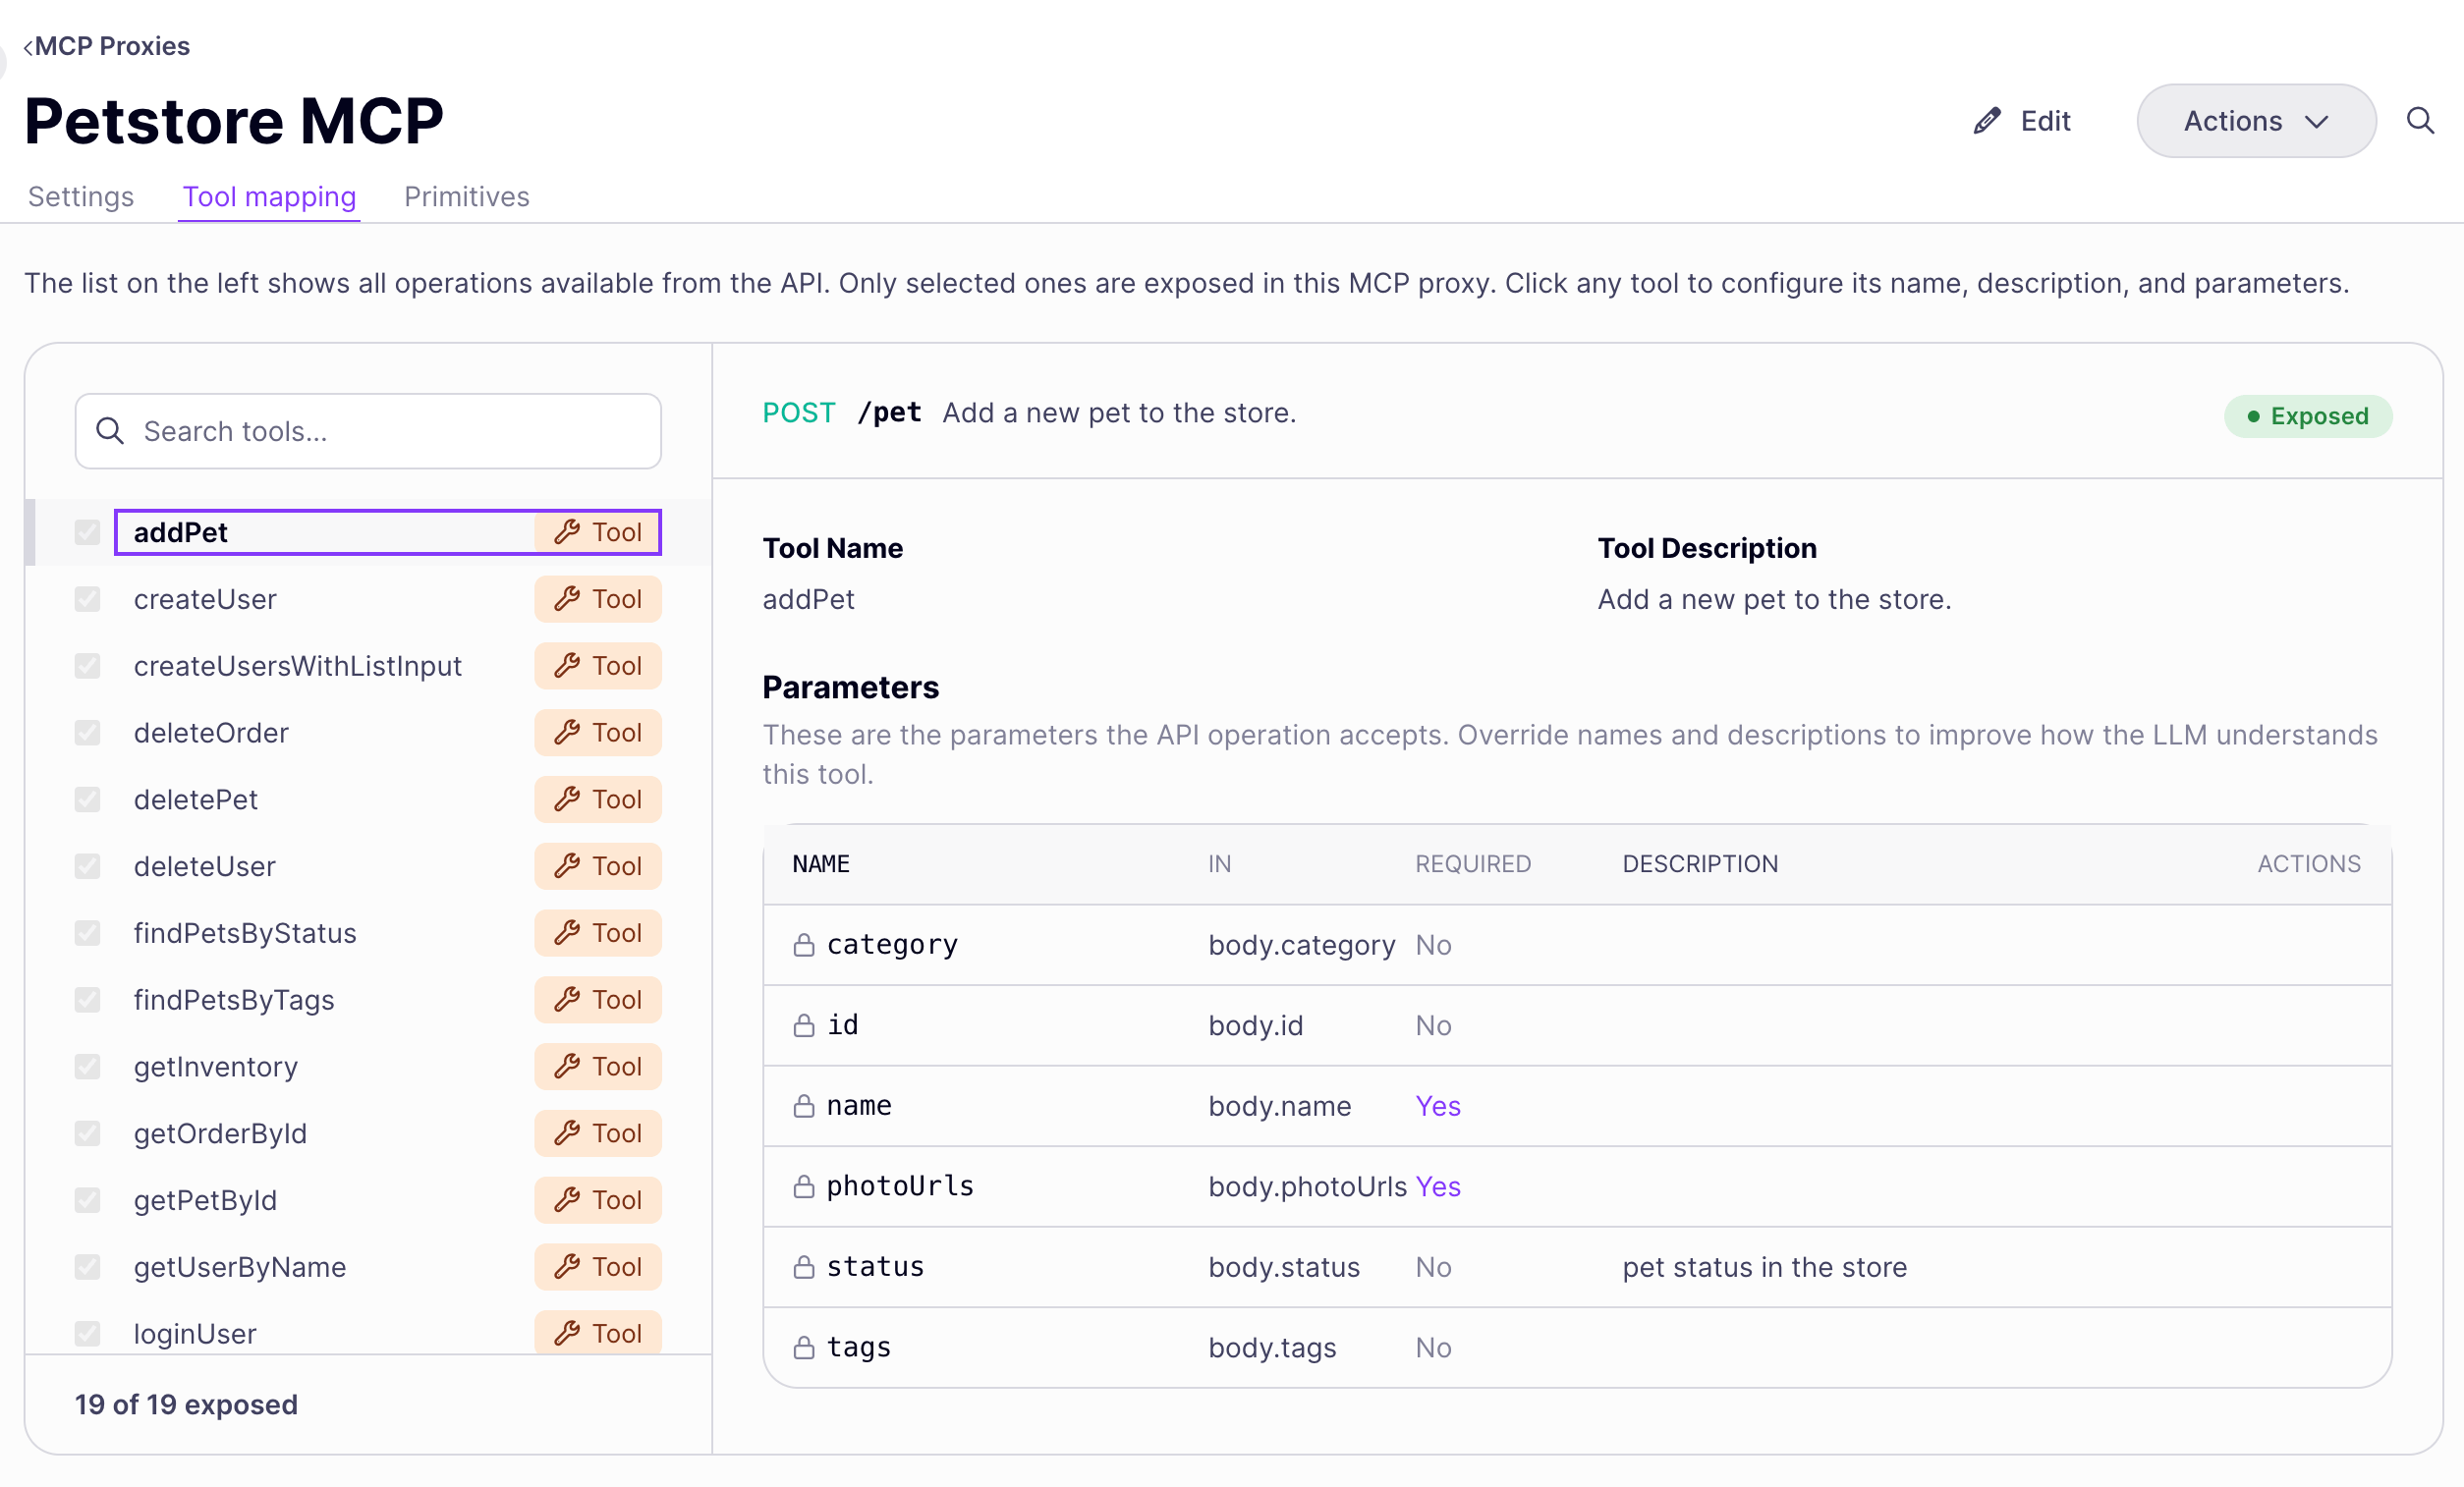
The checkbox next to each operation in the left-hand list controls whether it’s exposed: checking it adds the operation as a tool, unchecking it hides the tool without deleting your name, description, or parameter overrides. The detail pane shows an Exposed or Hidden pill reflecting this state.
Click Save MCP Proxy to apply your changes. These map to
x-tyk-mcp-server.primitives[] in the proxy definition. See REST API to MCP x-tyk-mcp-server extension for the full field reference.
Primitives tab
The Primitives tab lists every tool, resource, and prompt you have manually registered for this proxy. Each entry shows the primitive’s name, its type (Tool, Resource, or Prompt), and the number of middleware rules applied to it. Use the type filter and search input to narrow the list. Adding a primitive Click Add Primitive to open the add primitive modal. Select the type (Tool, Resource, or Prompt) and enter the primitive name: this must match the name the upstream MCP server uses when advertising that primitive. Names cannot contain whitespace and must be unique within their type. Adding a primitive creates an entry inx-tyk-api-gateway.middleware.mcpTools, mcpResources, or mcpPrompts (depending on type) in the proxy definition.
Adding middleware to a primitive
Click a primitive to open its detail view, then click Add Middleware. The following middleware is available for primitives:
Each middleware option maps to the corresponding configuration block inside the primitive’s entry in the proxy definition. See MCP middleware for what each option does and how it is configured.
Editing the full definition
The Dashboard UI covers most proxy configuration. To access advanced options not yet exposed in the UI, such as upstream OAuth, per-primitive token exchange overrides, and traffic management, edit the proxy’s underlying definition directly. Open the editor via Actions → View MCP Proxy Definition on the MCP Designer.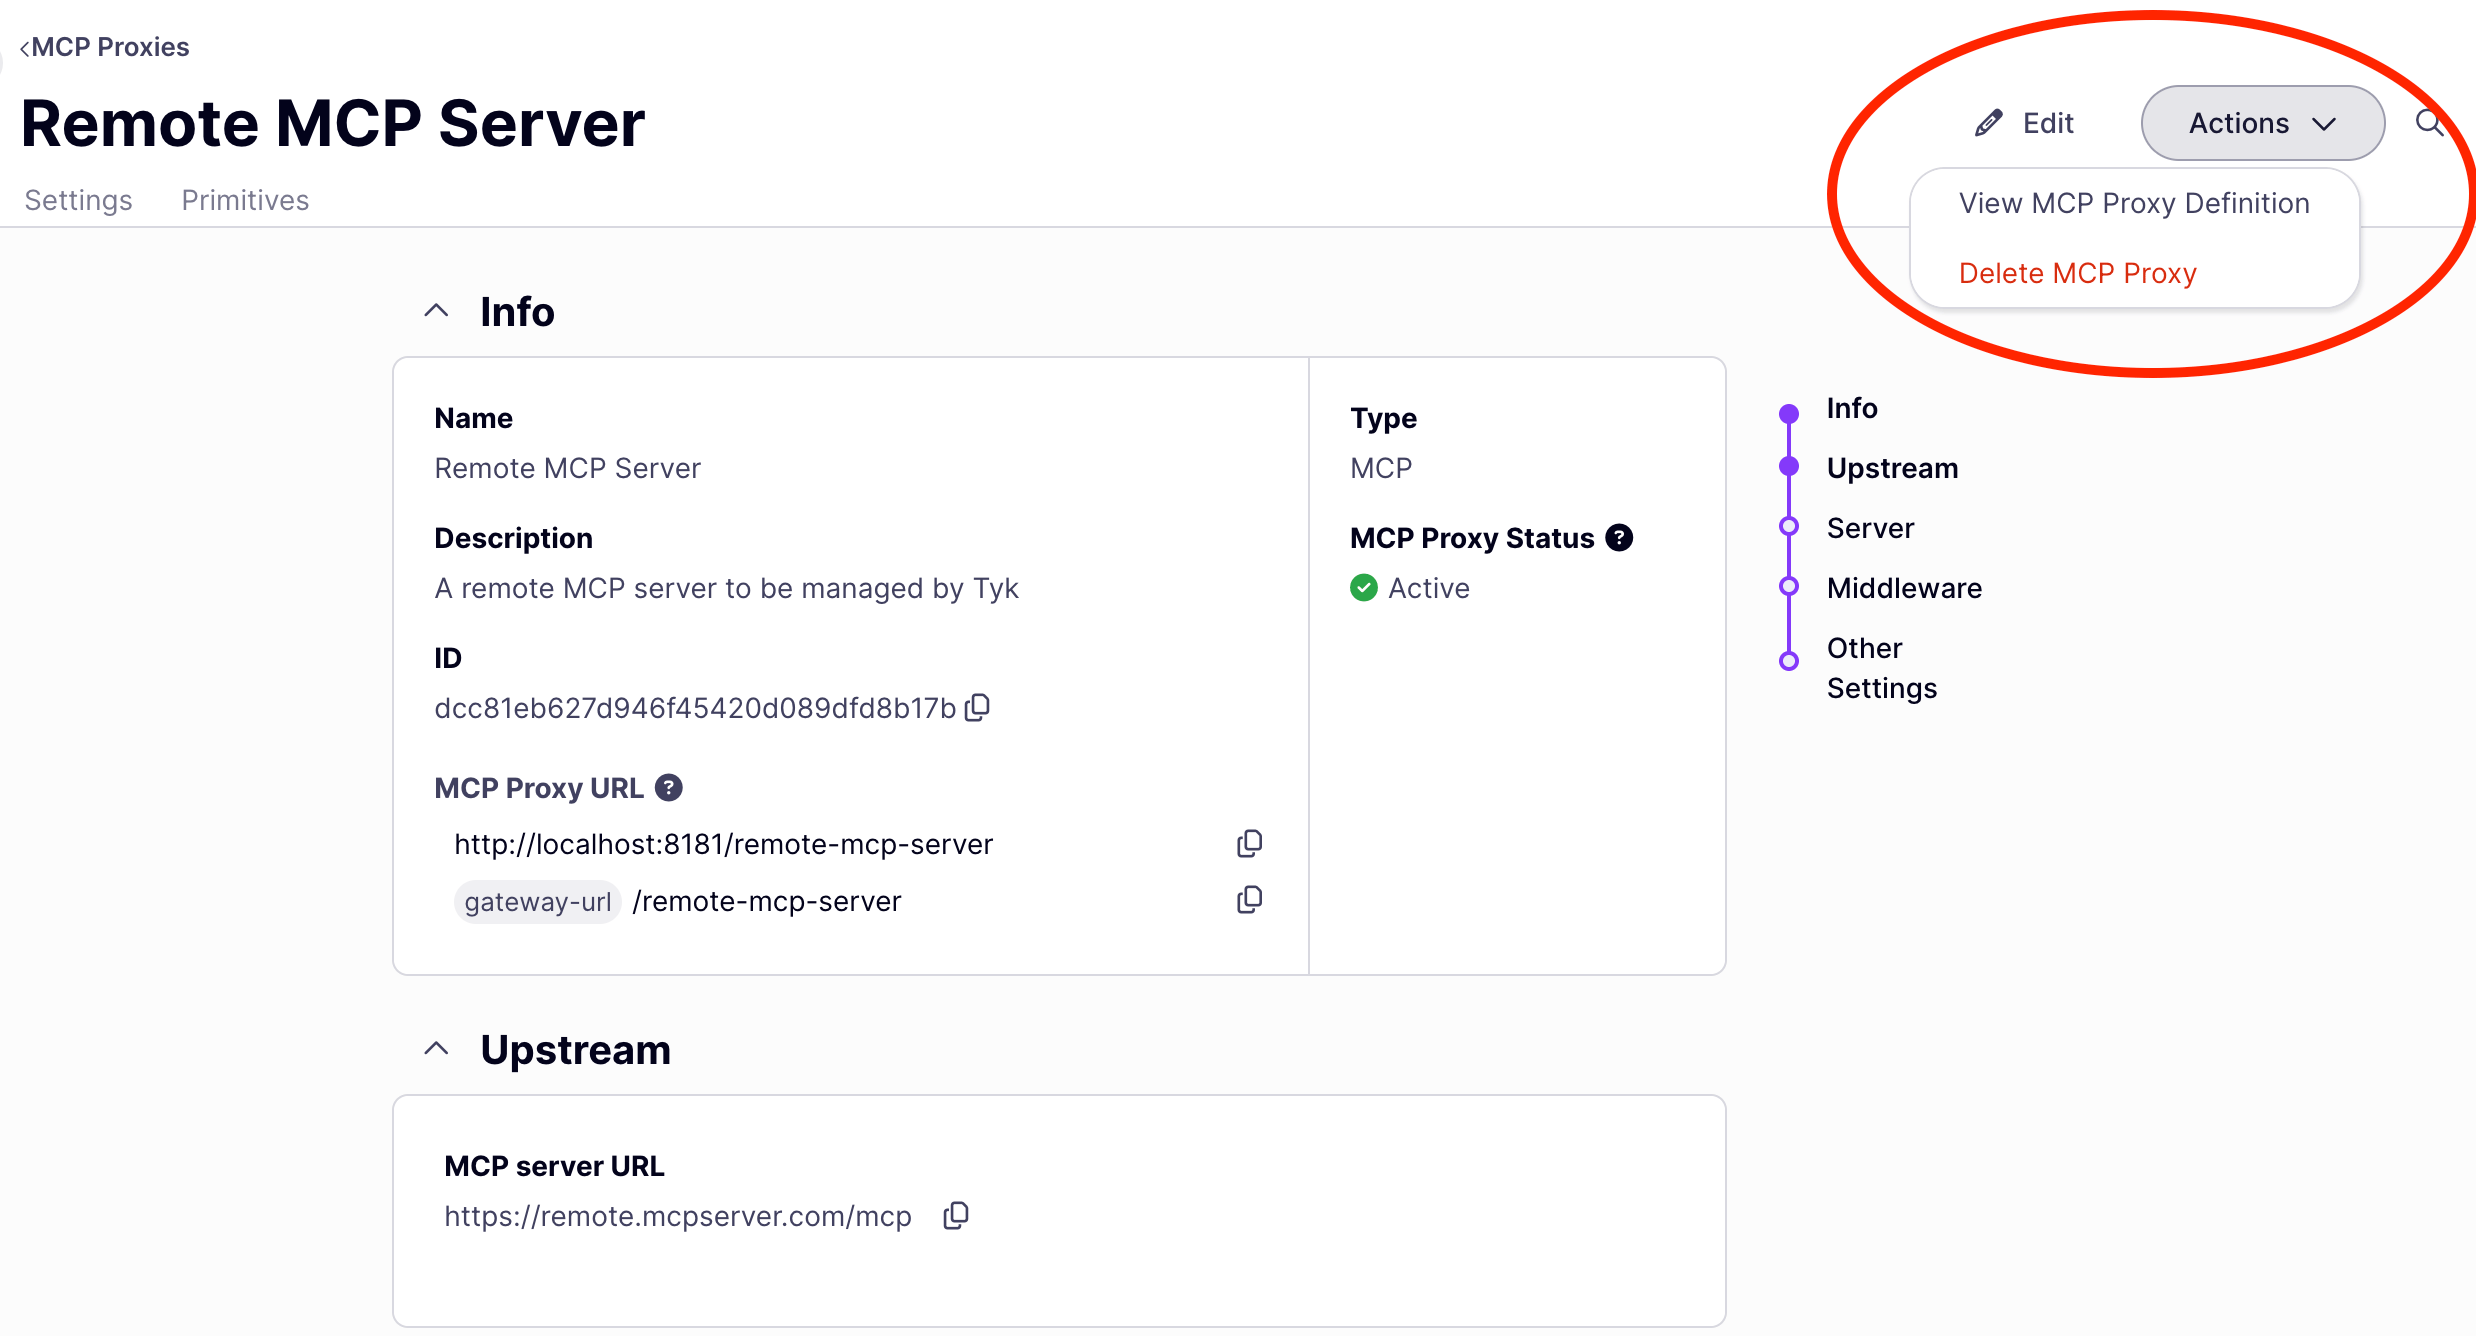
x-tyk-api-gateway vendor extension containing all Tyk-specific configuration. The key sections are:
After editing, click Save MCP Proxy to save and redeploy. Changes are applied to all connected gateways automatically.
Common edits after initial setup
Configuring authentication: The proxy is created with bearer token authentication enabled. To switch to a different method, open the Settings tab and select from the Authentication type dropdown. To use the external IdP integration — including scope check, PRM, and token exchange — select OAuth 2.0. See Authentication for all supported methods. Enabling PRM for OAuth discovery: Open the Settings tab, select OAuth 2.0 as the authentication type, and enable the Protected Resource Metadata toggle. Set the resource URL and add at least one authorization server URL. See OAuth 2.0 authentication for full configuration details. Restricting which tools clients can call: Use the Primitives tab: add the tool as a primitive, then add Allow middleware to it. Once any tool in the proxy has an Allow rule, all unlisted tools are blocked. For definition-based configuration, see MCP middleware: access control. Applying rate limits to a specific tool: Use the Primitives tab: open the tool primitive and add Rate Limit middleware. For definition-based configuration, see MCP middleware: traffic management. Configuring upstream OAuth: Add anauthentication.oauth.clientCredentials block to x-tyk-api-gateway.upstream to have Tyk obtain and forward OAuth tokens to your upstream MCP server. See MCP Gateway: OAuth 2.1 authentication.
Adding CORS or global header transforms: Configure these in the Settings tab under the middleware section. Changes apply to all requests through the proxy.
For a complete explanation of every field in the definition, see MCP proxy definition.
Delete an MCP proxy
- In the sidebar, click MCP.
- Open the proxy you want to delete.
- Click Actions → Delete MCP Proxy and confirm.
Deleting an MCP proxy also removes it from any versioning hierarchy it belongs to. If the deleted proxy was a versioned child, the version entry is removed from the base proxy’s definition.